Interpolation is how an animated value moves between two keyframes — it sets the value's easing, or how the motion accelerates and decelerates along the way. With Linear interpolation the value changes at a constant rate; with an easing type it starts or ends gradually for a softer, more natural feel.
You set interpolation per keyframe, so you can shape each segment of an animation on its own. Every keyframe has an interpolation type — the preset that shapes how the value moves into and out of it — which you set in the In and Out controls of the keyframe panel's inspector, or on the keyframe directly in the graph editor. To add the keyframes in the first place, see Keyframe Animation.
To open the keyframe panel, click Keyframes (a keyframe icon) in the control bar, or press Shift-K. Select a keyframe to show its interpolation controls in the inspector.
Choose an easing type#
- In Sequence, open the project and select the clip whose animation you want to change.
- Open the keyframe graph editor for the property you're animating. See Keyframe graph editor.
- Click the keyframe you want to change. To change several segments at once, select more than one keyframe.
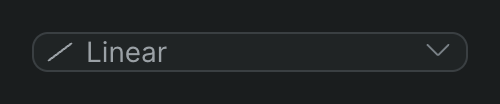
- Click the interpolation control — it shows the current type, such as Linear, next to a chevron.
- In the list, click the easing you want. Choose Ease In for a gradual start, Ease Out for a gradual stop, or Ease Both to ease at both ends. Linear keeps a constant rate.
Sequence updates the segment so the value eases as you chose. On playback, the animated property now accelerates or decelerates between the keyframes instead of moving at a constant rate.
The list also includes physics-style easings — Spring, Bounce, and Overshoot — plus Hold, Exponential, Logarithmic, and the Bezier types. Every type is described under Interpolation types below.
Tip
The interpolation control is a keyboard-accessible list. With it focused, press Enter or the Down Arrow to open it, use the Up Arrow and Down Arrow to move through the types (the highlight wraps around at the ends), press Enter to choose the highlighted type, or press Esc to close without changing anything.
Choose an easing from the context menu#
- In the keyframe graph editor, right-click the keyframe you want to change.
- In the menu, click the easing you want — the same options are listed, with the current type highlighted.
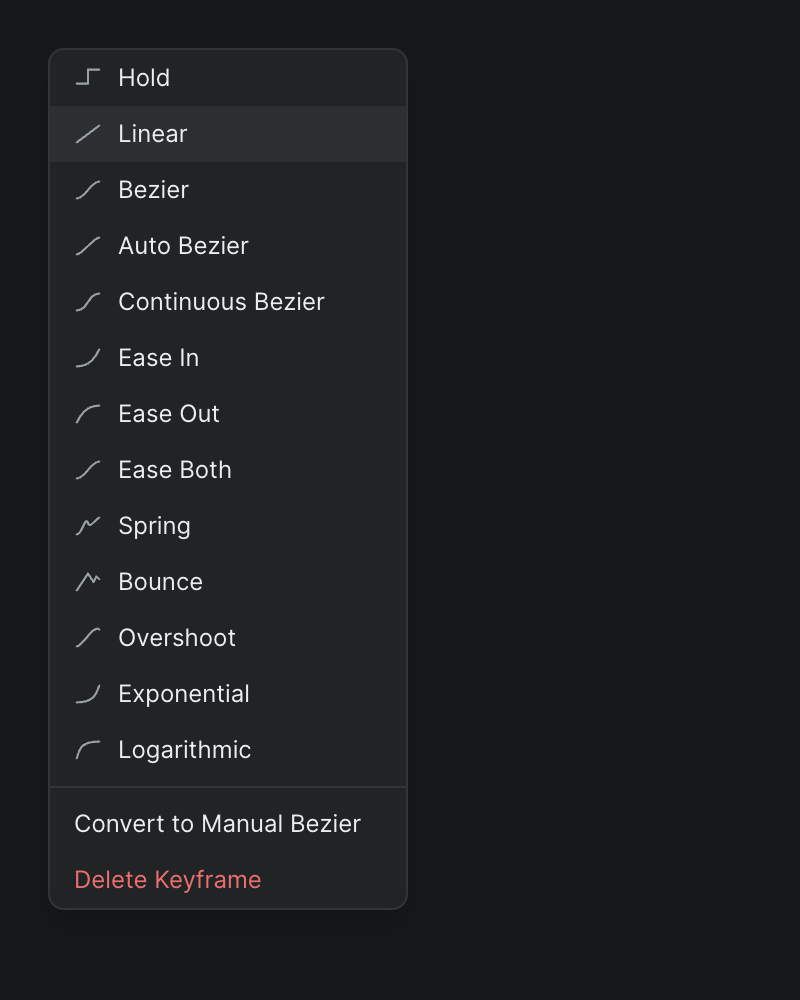
This is a faster path when you're already working directly on a keyframe.
Fine-tune the easing#
Some easing types add sliders so you can dial in the motion:
- Choose an easing that supports adjustment — for example Ease In, Ease Out, or Ease Both.
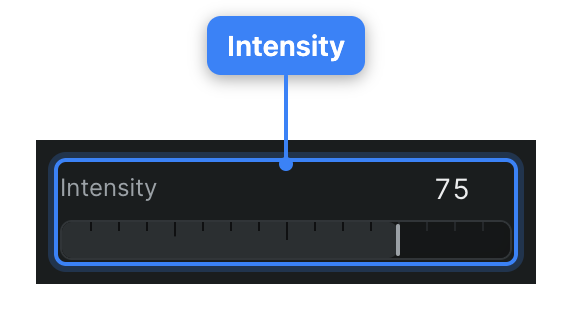
- Drag the Intensity slider (0–100) to set how strongly the value eases, or type a value in its number field.
Spring, Bounce, and Overshoot each expose their own sliders instead — such as Stiffness, Damping, and Mass for Spring, or Count and Decay for Bounce. For each slider's range and default, see Parametric controls below.
Shape a Bezier curve by hand#
For full control over the curve, use a Bezier type and shape it directly in the graph editor.
- Right-click the keyframe and click Convert to Manual Bezier, or choose Bezier from the interpolation control.
- In the keyframe graph editor, drag the keyframe's tangent handles to reshape the curve between it and its neighbor.
The value now follows the exact curve you drew. For more on the graph, see Keyframe graph editor.
In and Out#
The inspector shows two interpolation controls, one for each side of the selected keyframe.
- Out: Sets the interpolation of the segment leaving the keyframe. This is the main control. When you select several keyframes, changing Out applies to all of them, and it shows Mixed (with no curve icon) when the selected keyframes don't share the same type. New keyframes start as Bezier.
- In: Sets the interpolation of the segment arriving at the keyframe — which is the previous keyframe's outgoing side. It's active only when you've selected exactly one keyframe that has a previous keyframe on the property. Otherwise — including for the first keyframe on a property and for any multi-selection — it shows a disabled em dash (—).
Each control opens the same list of 13 interpolation types, and every option shows a small icon previewing its curve shape.
Interpolation types#

The list offers the same types on both In and Out, in this order:
- Hold: Keeps the value fixed until the next keyframe, then jumps straight to it — a stepped, constant hold with no motion in between.
- Linear: Moves the value at a constant rate, in a straight line between the two keyframes.
- Bezier: An eased S-curve that starts and ends gently. You can reshape its tangent handles by hand in the graph editor. New keyframes use this type.
- Auto Bezier: A smooth curve whose tangents Sequence calculates automatically from the neighboring keyframes, so the value passes smoothly through the keyframe. The tangents recompute as the surrounding keyframes move.
- Continuous Bezier: Another automatically smoothed curve through the keyframe, computed from its neighbors. Like Auto Bezier, its tangents are set for you rather than drawn by hand.
- Ease In: Starts slowly and speeds up toward the next keyframe.
- Ease Out: Starts at full speed and slows down as it reaches the next keyframe.
- Ease Both: Eases at both ends — a slow start and a slow finish.
- Spring: A physics-based curve that settles onto the value like a spring. Adds the Stiffness, Damping, and Mass sliders below.
- Bounce: A physics-based curve where the value bounces as it settles. Adds the Count and Decay sliders below.
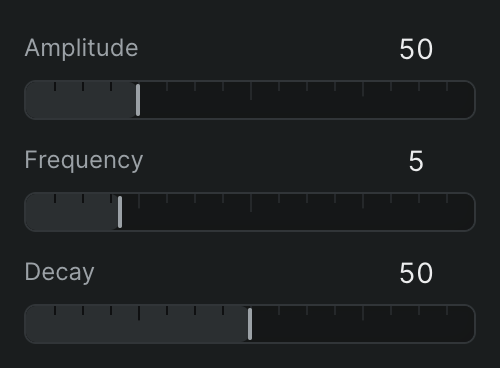
- Overshoot: A physics-based curve that overshoots the target value and oscillates back to it. Adds the Amplitude, Frequency, and Decay sliders below.
- Exponential: An accelerating curve, with no adjustable parameters.
- Logarithmic: A decelerating curve, with no adjustable parameters.
When several selected keyframes disagree, the Out control shows a read-only Mixed state instead of a type. You can't choose it — picking any type replaces it on all the selected keyframes.
Bezier, Auto Bezier, and Continuous Bezier add no sliders; you shape the Bezier types directly with their tangent handles in the graph editor. See The keyframe graph editor.
Parametric controls#
Four of the types add sliders directly below the In and Out controls. The sliders adjust whichever type is set on Out, and they appear only when a single keyframe is selected — not during a multi-selection. Hold, Linear, the Bezier types, Exponential, and Logarithmic add no sliders.
Ease In, Ease Out, and Ease Both#
Intensity: Range 0–100, step 1. Blends between a straight line and the easing's full curve: 0 is Linear (no easing) and 100 is the type's full curve. Default 100 — applying an ease starts at the full curve, and you dial down toward Linear.
Bounce#
Count: Range 1–10, step 1. The number of bounces. Default 3.
Decay: Range 0–100, step 1. How quickly the bounces die out. Default 50.
Overshoot#
Amplitude: Range 0–200, step 1. How far the value overshoots the target. Default 20.
Frequency: Range 1–20, step 0.5. How fast it oscillates. Default 2.
Decay: Range 0–100, step 1. How quickly the oscillations die out. Default 50.
Spring#
Stiffness: Range 0–100, step 1. The spring's stiffness. Default 50.
Damping: Range 0–100, step 1. The spring's damping. Default 50.
Mass: Range 0.1–10, step 0.1. The simulated mass. Default 1.
Note
Setting an interpolation type or dragging a slider updates the shared project, so collaborators see the new motion once your change syncs, and each edit is undoable.