A keyframe pins a property's value to a specific point in time. Set two or more keyframes on the same property — position, scale, opacity, and other animatable values — and Sequence interpolates the values in between, so the property changes smoothly over time.
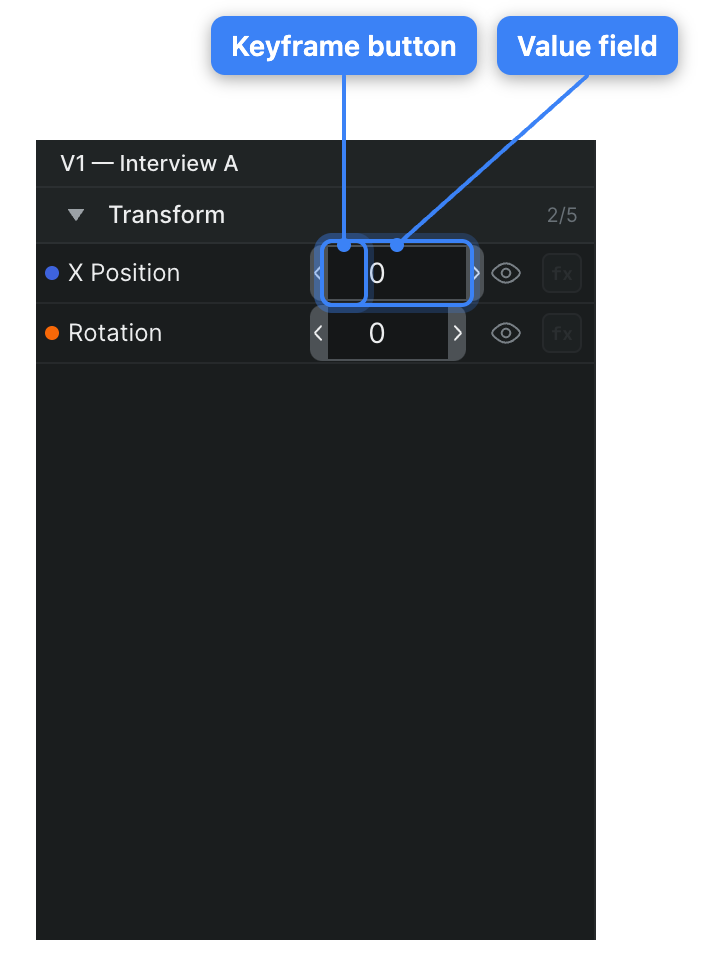
Animatable properties appear as rows in the keyframe panel. Each row has the property's name, a value field, and a keyframe button — a small diamond icon beside the value — that you click to set and remove keyframes. When a property has keyframes, prev/next arrows appear alongside the button.
Set the first keyframe#
- In Sequence, open the project and select the clip whose property you want to animate.
- In the keyframe panel, find the property's row and move the playhead to the frame where the animation should start.
- In that row, click the keyframe button — the diamond icon to the left of the value.
Sequence sets a keyframe at the playhead using the property's current value and arms the property. Once a property is armed, its value field is outlined to show that it will record further changes as keyframes.
Add keyframes to build the animation#
With the property armed, add each additional keyframe at the frame where you want the property to reach a new value:
- Move the playhead to a later frame.
- In the property's value field, enter a new value. Sequence sets a new keyframe at the playhead automatically.
Repeat for each point in the animation. The property now animates between the keyframes you set.
Tip
To pin the current value at the playhead without changing it, click the keyframe button again while the property is armed. This adds a keyframe at the current value, anchoring the property at that frame.
Move between keyframes#
When a property is armed, left and right arrows appear beside the keyframe button.
- Click the left arrow to jump the playhead to the previous keyframe.
- Click the right arrow to jump to the next keyframe.
An arrow is active only when a keyframe exists in that direction. When the playhead sits exactly on a keyframe, the keyframe button appears filled — that's how you know you can edit or remove the keyframe at the current frame.

Remove a keyframe#
- Using the arrows, move the playhead onto the keyframe you want to remove. The keyframe button appears filled.
- Click the keyframe button.
Sequence removes the keyframe at the playhead. When you remove the last keyframe on a property, it stops animating and holds a single value again.
Note
Setting keyframes controls a property's value at each point in time. To shape the motion between keyframes — easing, holds, and bezier handles — see Adjust keyframe interpolation and Edit animation in the graph editor. To drive a property from a formula instead of hand-set keyframes, see Drive properties with expressions.