A clip's sound often arrives as more than one stream — a stereo mix alongside a separate lav mic, or the several channels of a surround file. Sequence treats each of these as an audio component: a single audio stream carried by a clip. In Track view, you can see a clip's components, turn individual ones on or off, and assign each to a component track so it routes with the rest of your mix. A component track is a project-level destination for audio — several components, across different clips, can point at the same track.
Components stay hidden while you edit picture. You reveal them by switching the timeline from its default Reflow view to Track view.
Switch between Reflow and Track view#
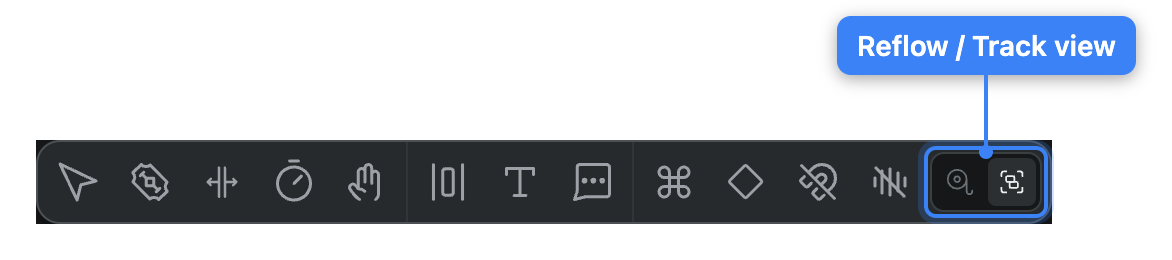
The timeline has two view modes, set by a toggle in the control bar below the preview:
- Reflow (the reel icon) is the default. Clips read as single blocks and their audio components stay tucked away.
- Track (the node icon) reveals each selected clip's audio components in the inspector.
To switch views, do either of the following:
- From the control bar: Click the Track button in the control bar below the preview to reveal components, or Reflow to hide them again. Hovering each button shows its name.
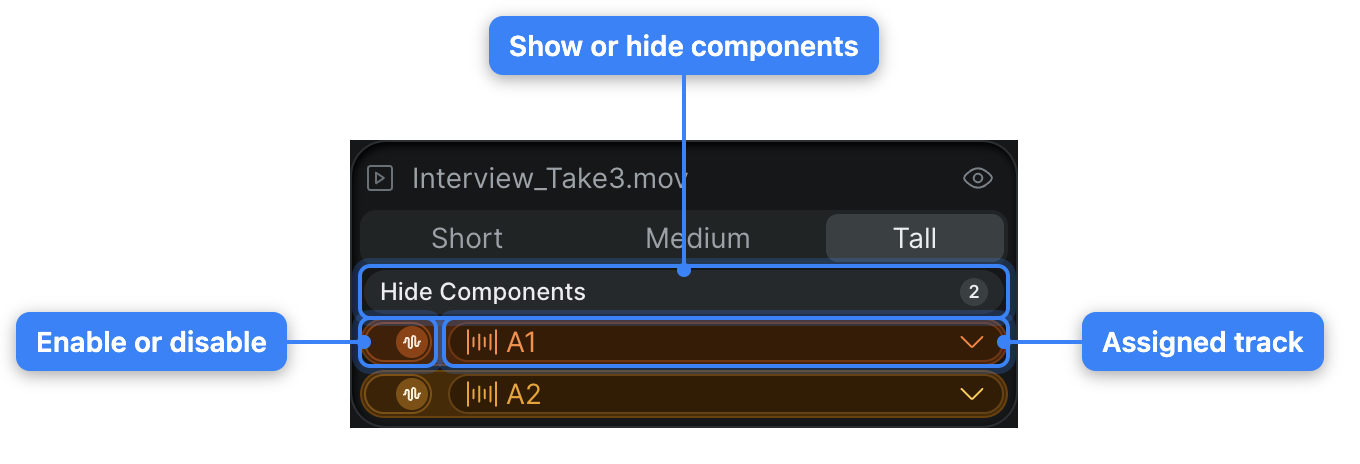
- From a selected clip: Select a clip that carries audio and, in the inspector's element info at the top, click Show Components. This switches the timeline to Track view and expands that clip's component strips. The button reads Hide Components once components are showing, and the number beside it is the component count.
The view mode is a project setting, so the timeline stays in the view you chose the next time you open the project.
Read a component strip#
In Track view, each of a clip's audio components appears as its own strip in the inspector. From left to right, a strip shows:
- Enable switch: Turns the component on or off.
- Track pill: The component track this component is assigned to, shown by name with an icon. Reads Select track when nothing is assigned yet.
- Channel layout: A small pill showing the component's channel layout (for example, Stereo or 5.1), when the component has one.
- Waveform: A preview waveform for each of the component's channels, so you can pick out the stream you're after by its shape.
Turn a component on or off#
Silencing one component leaves the clip's other components playing.
- In Sequence, switch to Track view and select the clip.
- Click the enable switch at the left of the component's strip.
The component goes silent but stays on the clip, so you can switch it back on at any time. A disabled component is dimmed in the strip.
Assign a component to a track#
Routing a component to a track sends its audio to that track along with every other component pointed at the same place.
- In Sequence, switch to Track view and select the clip.
- On the component's strip, click the track pill (labeled with the current track, or Select track).
- In the menu, do either of the following:
- Choose an existing track: Click any track in the list.
- Create a track: Choose the option to add a new track, and Sequence assigns the component to it.
The pill updates to the track you chose. Because component tracks belong to the project, a track you create here is available to components on other clips too.
Manage component tracks#
The inspector's Component Tracks module lists the project's audio tracks and lets you add, rename, reorder, and remove them. It appears once the project has component tracks.
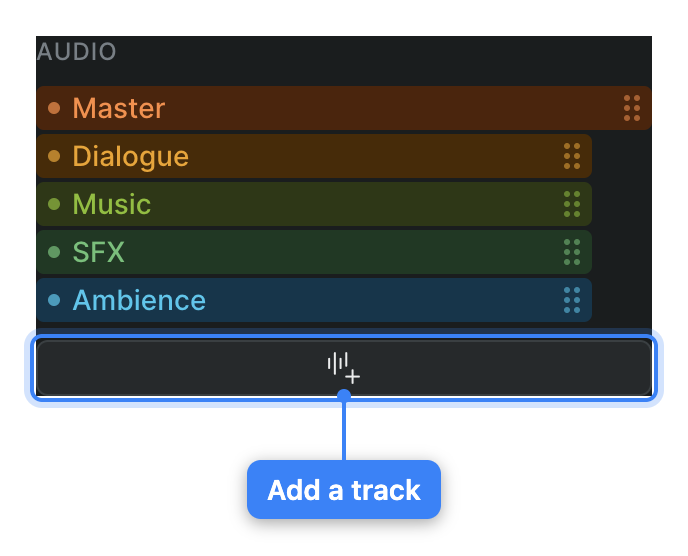
- Add a track: Click Create audio component track below the Audio list. Sequence adds a new audio track and confirms with a toast.
- Rename a track: Click a track's name to edit it in place, then confirm. The project's default track can't be renamed.
- Reorder tracks: Drag a track up or down in the list to change its order.
- Delete a track: Point at a track and click its delete button. Because components may still be routed to it, Sequence asks you to pick a replacement track to receive them before it removes the track. You can't delete the default track, or the last remaining track of a type.
Note
Component tracks, assignments, and enable states are project changes — they save with the project and are visible to your collaborators. See Detach and adjust clip audio.
Set how a clip splits into components#
For a regular clip, an Audio Configuration pill sits beside the Show Components control. It sets how the clip's channels are grouped into components:
- Original: Keeps the clip's source layout as-is. This is the default.
- Mono: Splits every channel into its own single-channel component.
- Stereo: Groups channels into stereo pairs.
Click the pill and choose a configuration to regroup the clip's components. This control is for regular clips; nested timelines and multicam clips are handled differently — see Passthrough and downmix for nested audio.