Sequence gives you two audio tools in the inspector: an Equalizer for shaping frequency balance, and a channel-routing matrix for mapping a clip's input channels to output channels. Select an audio clip or component to see these modules. For how to open and read the inspector, see Inspector Panel.
Equalizer#
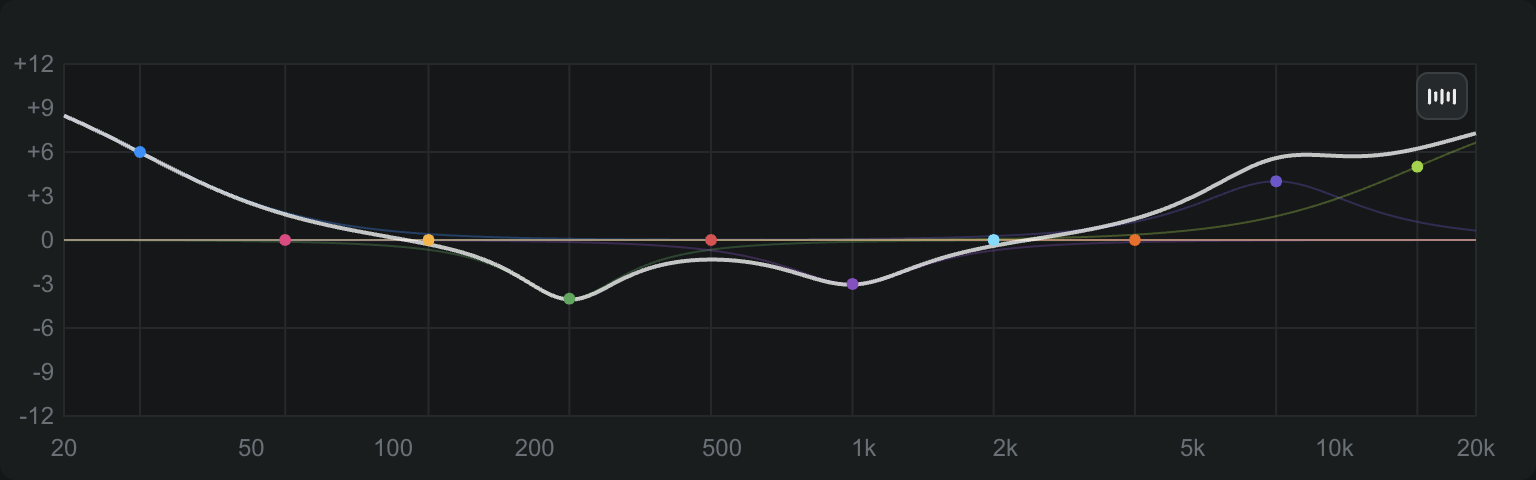
The Equalizer module shapes a clip's tone across a set of frequency bands. Controls appear top to bottom in the module.
Toggle switch (top-right of the module header): turns EQ on or off for the clip. The switch tooltip reads Toggle EQ on/off. When EQ is off, the graph and band controls are hidden.
Preset dropdown (labeled Select Preset until you choose one): applies a saved band configuration. The confirmed presets are Default, Voice Enhance, Music Enhance, Loudness, Hum Reduction, Bass Boost, Bass Reduce, Treble Boost, and Treble Reduce. When you edit any band by hand, the dropdown switches to Custom.
Channels dropdown (labeled Channels): shows the number of EQ bands. This control is currently disabled, so the band count is fixed.
EQ graph: the frequency-response curve, with frequency along the bottom (20 Hz to 20k) and gain up the left side (−12 to +12 dB). Each band has a colored control dot. To adjust a band directly on the graph:
- Drag a dot up or down to change its gain (how much that band is boosted or cut).
- Drag left or right to change its Q (the bandwidth — how wide a range of frequencies the band affects).
- Hold Alt (Windows) or Option (Mac) while dragging left or right to change the band's center frequency instead.
Analyzer button (top-right corner of the graph): overlays a live frequency readout of the audio playing through the clip. Its tooltip reads Show Analyzer, and Hide Analyzer once it's on. When the analyzer is on, a level scale (−60 to 0) appears on the right side of the graph.
Band Adjustments#
Expand the Band Adjustments section to set a band's values numerically. Use Reset in the section header to return the selected band's gain and Q to their defaults while keeping its frequency.
- Select Band dropdown: chooses which band the sliders control. Each option is labeled with its band number and frequency, for example Band 1 - 29 Hz.
- Gain slider: sets the selected band's gain, from −12 to 12 dB. Positive values boost the band; negative values cut it.
- Q slider: sets the selected band's Q (bandwidth). A higher Q affects a narrower range of frequencies around the band's center.
High-Pass Filter and Low-Pass Filter#
Below Band Adjustments, the High-Pass Filter and Low-Pass Filter sections each expand to reveal their own adjustments. A high-pass filter attenuates content below its cutoff; a low-pass filter attenuates content above it.
Note
Editing EQ is a project change. Your bands and presets are saved with the clip and are visible to collaborators. See Audio Editing.
Channel mapping#
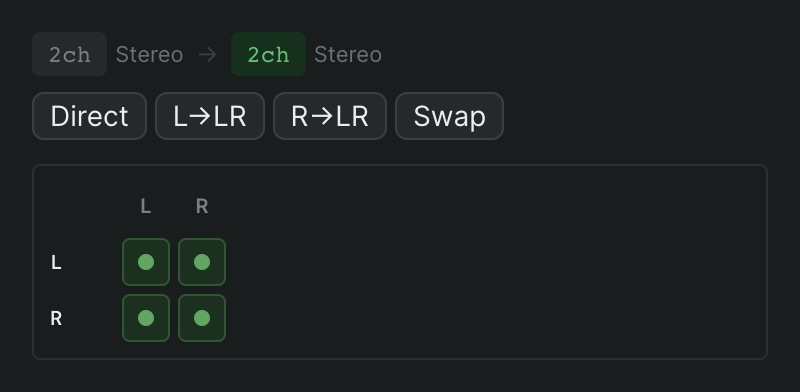
The channel-routing matrix maps a clip's input channels (rows) to output channels (columns) — for example, routing stereo to mono, swapping left and right, or downmixing surround. The controls appear top to bottom.
Routing summary (top of the section): two chips separated by an arrow show the current input and output channel counts (for example, 2ch → 2ch) with a short description of each layout. If the clip's routing is locked, a Read-only chip appears here and the matrix can't be edited.
Preset buttons: one-click routing shortcuts that appear based on your clip's input and output channels. The confirmed presets and what they do:
- Direct — direct 1:1 routing (L→L, R→R).
- L→LR — duplicates the left channel to both the L and R outputs.
- R→LR — duplicates the right channel to both the L and R outputs.
- Swap — swaps left and right channels (L→R, R→L).
- 5.1→St — downmixes 5.1 surround to stereo.
The button matching the current routing is highlighted.
Routing grid: a matrix of toggles with input channels labeled down the left and output channels across the top. Click a cell to connect or disconnect that input-to-output pair; a filled cell means the input is routed to that output. If the clip has no routable channels, the grid shows No routing available.
Note
When the matrix is read-only, Sequence shows the message "To edit routing, switch to Downmix mode or edit source elements." Follow that prompt to make the grid editable.