The Audio meters panel shows the peak level of each audio channel while the preview plays, so you can watch for clipping as you work. It lives in the editor's Edit workspace as a narrow column beside the preview monitor, and a compact mini meter sits in the center of the playback control bar. The panel is hidden until you open it, and every reading comes from the preview audio — so the meters move only while the preview is playing with sound.
Note
These are peak level meters, measured in dBFS. They do not report loudness (LUFS) or an averaged RMS/VU level. To normalize a clip toward a loudness target, use the Loudness effect — see Audio effects.
Show or hide the meters#
The full-size panel is hidden by default, and it opens as a narrow, resizable column beside the preview monitor. Sequence remembers the panel's state per project, so it stays as you left it the next time you open the project. To toggle it, do either of the following:
- View menu: In the editor's top menu, open View and choose Toggle Audio Meters.
- Mini meter: Click the mini meter in the center of the playback control bar. Its tooltip reads Show/Hide Full Size Audio Meters.
There is no keyboard shortcut for the audio meters; use the View menu item or the mini meter.
Meter Display#
The controls and readouts below appear from the top of each channel column downward. None of them is adjustable — the scale, thresholds, and timing are fixed.
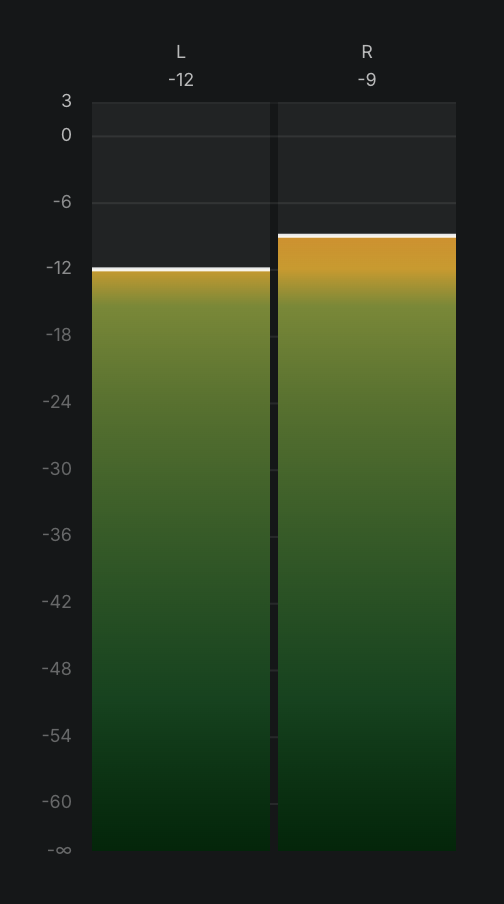
Channel columns and labels: The panel shows one vertical bar per audio channel, with the channel's name at the top of its column. Sequence derives the names from the preview stream's channel layout: mono is M; stereo is L and R; 5.1 is L, R, C, LFE, Ls, and Rs; 7.1 adds Lrs and Rrs; any other layout is numbered Ch1, Ch2, and so on. The number of columns follows the stream and is not user-set.
Peak level readout: Just below each channel name, a number shows that channel's held peak level in whole dBFS. It is the recent peak, not the instantaneous level, so it lingers at the loudest value for a moment before it falls.
dBFS scale: Gridline marks run down the side of the panel at -∞, -60, -54, -48, -42, -36, -30, -24, -18, -12, -6, 0, and 3. The scale is fixed (roughly −60 dBFS up to +3 dBFS) and cannot be changed.
Level bar: Each channel's bar fills from the bottom up as the signal gets louder, with a fixed gradient that runs green in the safe range, into yellow toward the warning level, and into red at the top of the scale.
Warning threshold: Fixed at -12 dBFS. The bar's gradient shifts toward yellow at and above this level, marking audio that is getting hot.
Clip threshold and clip indicator: Fixed at 0 dBFS. When a channel reaches 0 dBFS, its numeric readout, its channel label, and its peak-marker line turn red to flag the clip. The clip indication holds for about three seconds after the peak, so a brief overload is still visible after the level drops back.
Peak-hold marker: A thin line marks the most recent peak on each bar and decays about a second after the level falls, giving you a moment to read a transient you might otherwise miss.
Mini meter#
The mini meter is a compact six-segment meter shown in the center of the playback control bar, next to the timecode. It gives you an at-a-glance peak reading without opening the full panel: the segments light from the bottom up as the level rises, and the top segments light red when the signal reaches 0 dBFS. Clicking the mini meter toggles the full-size panel, as described in Show or hide the meters above.
When the meters are active#
The meters stay flat until the preview is playing and its audio is unmuted — Sequence connects the analyzers only once both the preview stream and unmuted audio are ready. Press play with sound on to see the meters respond.
Metering runs locally in your browser from your own preview audio. Your levels are not shared with collaborators, and other people's playback does not change what your meters show.