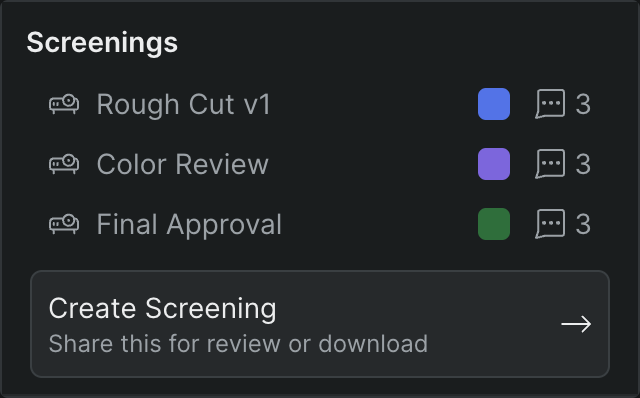
Once you've created a screening, you manage it from the Screenings module — the same list you started it from, in the inspector's Info tab. Every action lives on a right-click menu: edit the screening's details, mark it as a personal favorite, or delete it. There are no separate buttons and no keyboard shortcuts for these actions.
Open a screening's menu#
- In Sequence, open the project and select the library item (or a clip cut from one) that the screening belongs to.
- Open the inspector and click Info in the row of tabs across the top.
- In the Screenings module, find the screening you want to work with.
- Right-click the screening. A menu opens with four options: Edit screening, View screening, Add to favorites (or Remove from favorites), and Delete.
The menu stays anchored to that screening, so each action below picks up from this right-click.
Note: Left-clicking a screening instead of right-clicking opens it in the Review app inside the project — see The Review app. The View screening option on the right-click menu is different: it opens the published screening page in a new browser tab, exactly as a reviewer sees it.
Edit a screening#
Editing changes the published screening for everyone who has the link.
- Right-click the screening in the Screenings module and choose Edit screening.
- In the Editing dialog, update any of the fields under Details and Settings — the Name, Status, description, Access, and the Allow commenting and Allow downloads switches. These are the same fields you set when you create a screening; for what each one controls, see Screening settings.
- Click Update Screening.
Sequence saves your changes to the published cut. Reviewers see the updated name, status, and settings the next time they open the link. To close the dialog without saving, click Cancel.
Note: Setting Access to Private requires a plan that includes private screenings. If yours doesn't, the button changes to Upgrade to Continue — you can still save the screening as Public. See Screening settings.
Favorite a screening#
Favoriting is a personal bookmark. A favorite is private to you and doesn't change anything your collaborators see.
- Right-click the screening in the Screenings module and choose Add to favorites.
Sequence adds the screening to the Favorites section of your workspace sidebar, so you can jump back to it from anywhere in the workspace. To remove it, right-click it again — in the Screenings module or in your Favorites list — and choose Remove from favorites.
Delete a screening#
Deleting a screening can't be undone
Deleting removes the screening and takes down its published page for everyone who has the link. Your project and the cut behind the screening aren't touched — only the screening itself is deleted.
- Right-click the screening in the Screenings module and choose Delete.
- In the confirmation dialog — titled Are you sure you want to delete this screening? — check that you're removing the right one. The dialog warns that the screening will be permanently deleted.
- Click Delete to confirm.
Sequence permanently removes the screening and takes down its published page. Reviewers and collaborators who had the link can no longer open it, and there's no undo. To keep the screening, click Cancel instead.
Screening actions in the Review app#
The Review app has its own right-click menu on screenings, separate from the inspector's Screenings module covered above. Where the module's menu edits and shares a screening, the Review app's menu sets its status, privacy, and copies its links. Open the Review app, right-click a screening in the Screenings panel — the list of every screening in the project — and this menu appears. For the panel itself, see The Review app.
Two different menus
This is not the same menu as the inspector's Screenings module. Its entries — Copy, Status, Privacy, Toggle Favorite, and Delete Screening — are specific to the Review app's Screenings panel.
The menu holds five entries, top to bottom:
- Copy — a submenu with two clipboard actions:
- Screening Link — copies the screening's shareable page link, the same URL a reviewer opens.
- Download Link — copies a direct download link to the screening's source file. Available only when the screening has a source asset behind it.
- Status — a submenu that sets the screening's status in place, without opening the Editing dialog: No Status, Needs Review, Rough Cut, Color Lock, or Approved (numbered 0–4 in the menu).
- Privacy — a submenu that sets the screening's access: Public or Private. Setting Private requires a plan that includes private screenings — see Screening settings.
- Toggle Favorite — adds the screening to your Favorites, or removes it if it's already a favorite. This is the same personal bookmark as Add to favorites above, private to you.
- Delete Screening — opens a confirmation dialog, then permanently removes the screening and takes down its published page for everyone who has the link.