The Inspector Panel shows the properties of whatever you have selected — a clip on the timeline, the timeline itself, or an item in your library — and lets you adjust them. What it shows changes with your selection: select a clip and you get its layout, timing, blend, and audio controls; select the timeline and you get its video and audio output settings.
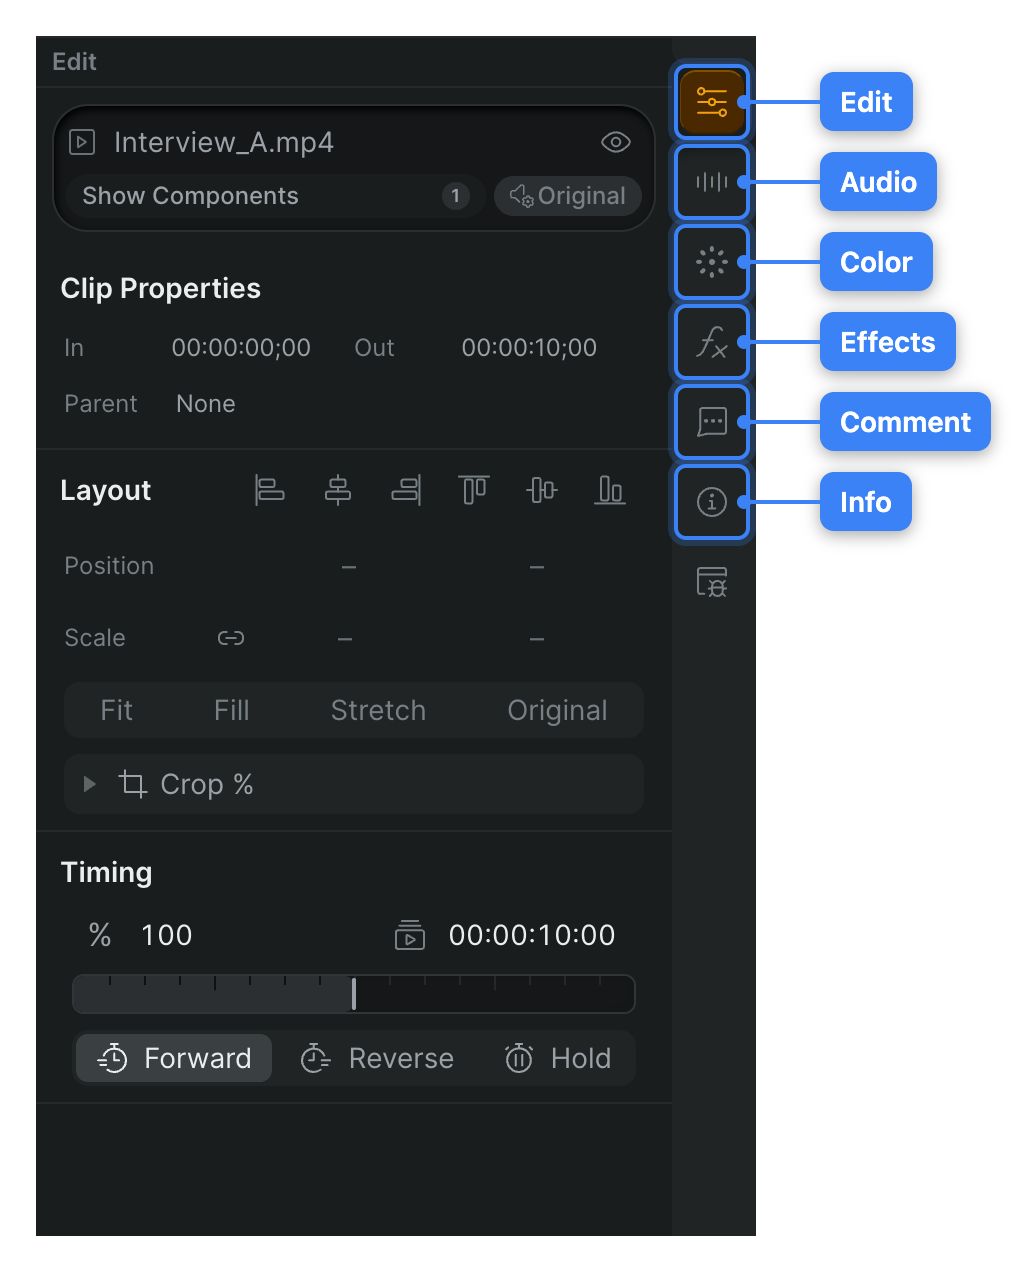
Switch inspector tabs#
A row of tabs down the side of the inspector groups the controls for the current selection. Click a tab to switch, or use its keyboard shortcut. Which tabs appear depends on what you've selected — the inspector runs in three modes.
A selected clip#
Selecting a clip on the timeline gives every tab — Edit, Audio, Color, Effects, Comment, and Info — because a clip has layout, timing, audio, and color to adjust. That's the mode shown at the top of this page.
The timeline itself#
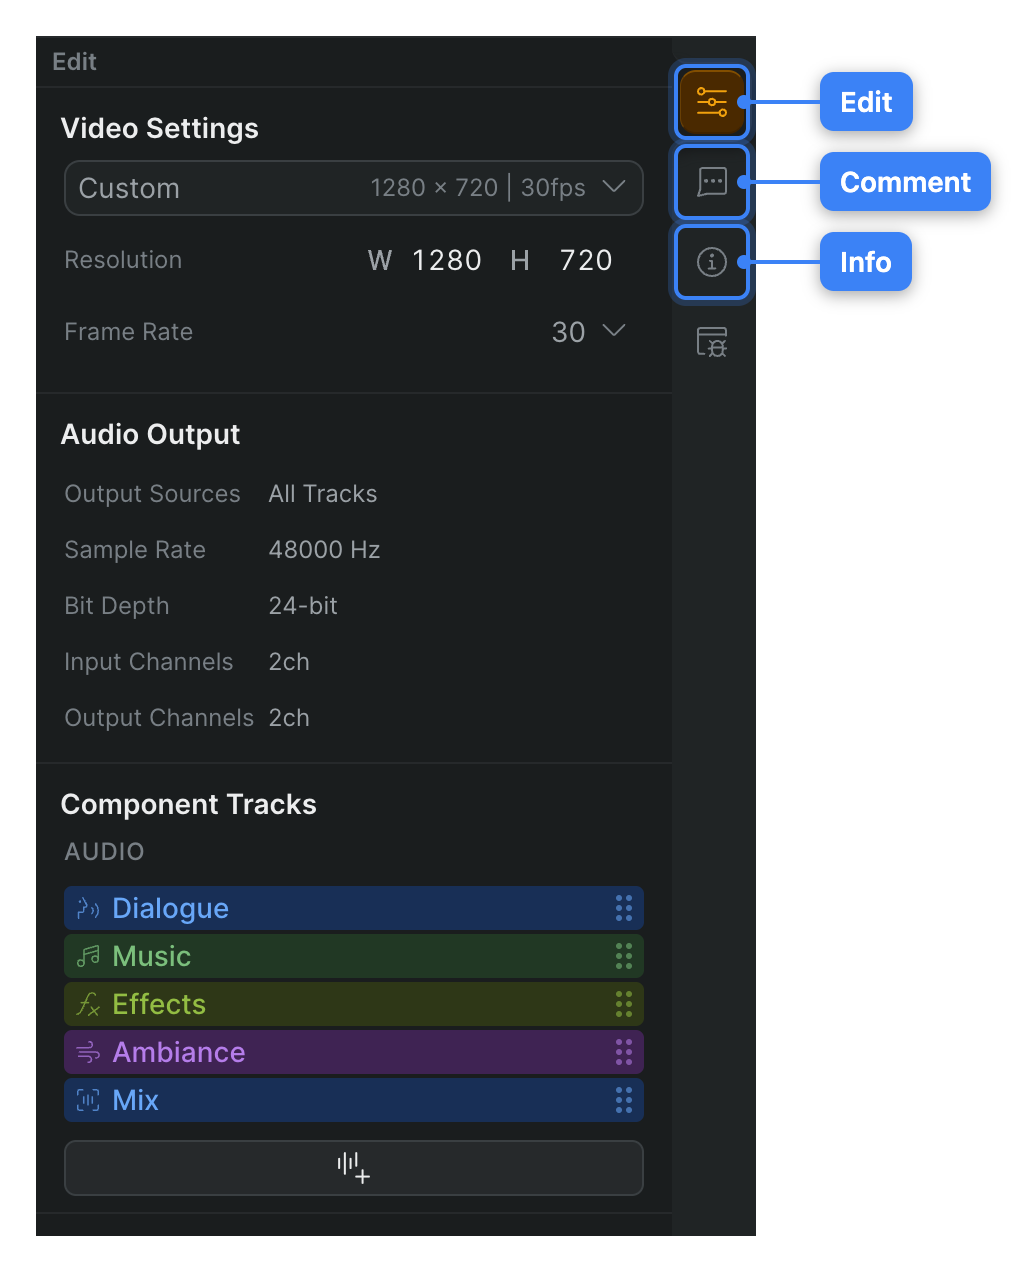
Select the timeline rather than a clip and the inspector narrows to Edit, Comment, and Info — there's no per-clip audio or color to set, and the Edit tab instead holds the timeline's output settings (see Timeline settings).
A library item#
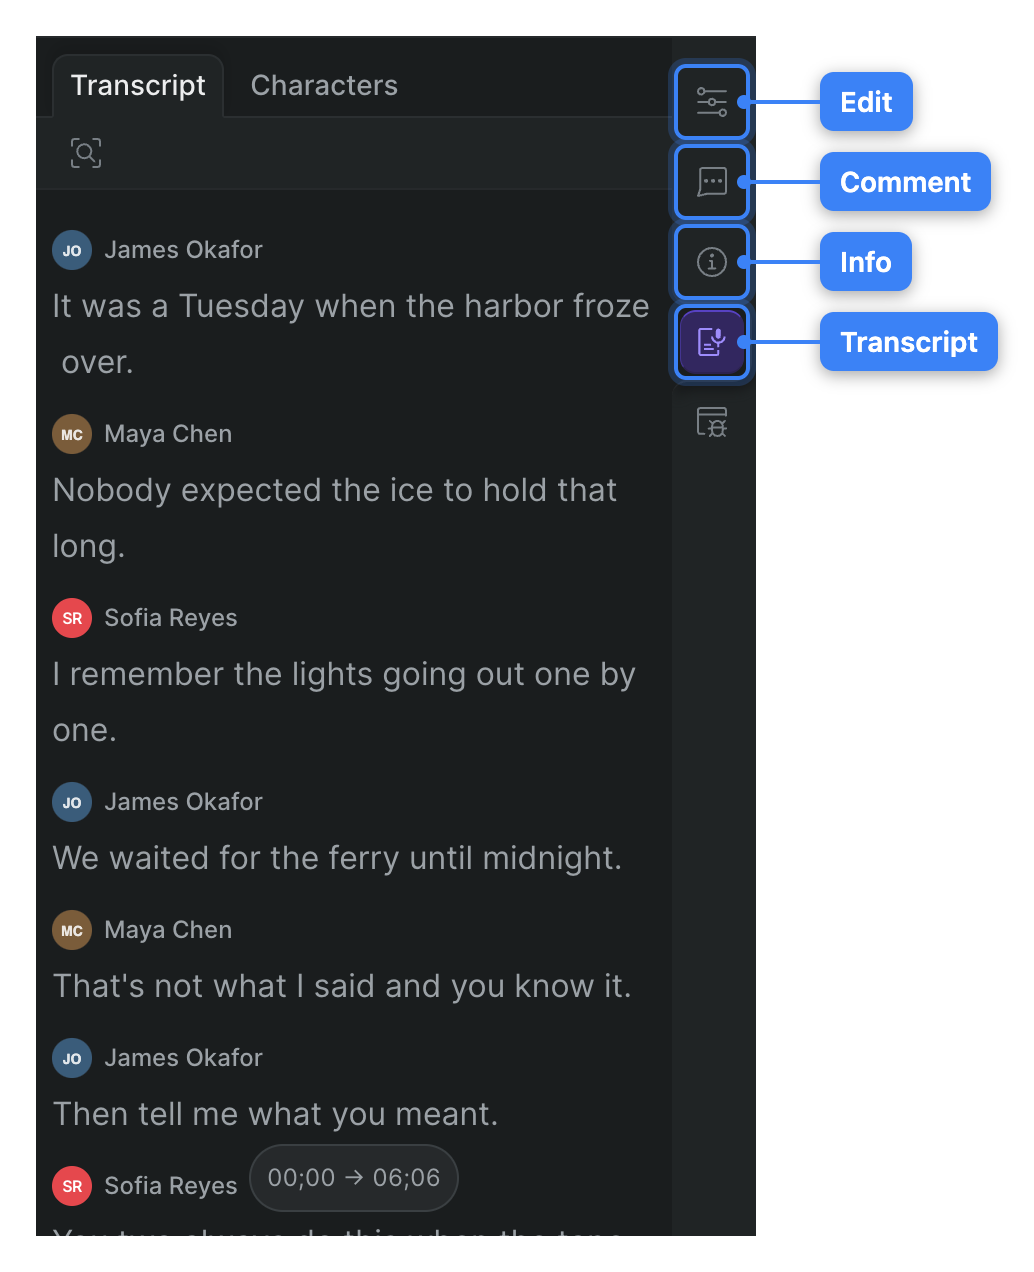
Select an item in your library and the inspector adds a Transcript tab alongside Edit, Comment, and Info, so you can read a clip's transcript and speakers without putting it on the timeline.
Here's what each tab holds:
- Edit — Layout, timing, and per-clip details. The default tab for a selected clip or timeline. (Press G then E.)
- Audio — Volume, channel mapping, and audio EQ for a clip. See Audio EQ and channels. (Press G then A.)
- Color — Blend mode, opacity, and color adjustments. (Press G then C.)
- Effects — Added visual effects and their controls. See Intro to custom effects.
- Comment — Comments attached to the selection.
- Info — Metadata, description, and people for the selection.
- Transcript — The speech transcript for a library item. Appears only when a library item is selected.
Clip header#
The header at the top of a selected clip's inspector identifies the clip and holds its top-level controls.
- Clip name — The name of the selected clip, next to an icon for its type.
- Enabled / disabled toggle — Turns the clip on or off in the timeline without deleting it. A disabled clip is skipped on playback and export. (Press Cmd-Shift-D — Windows: Ctrl-Shift-D.)
- View in library — Jumps to the clip's source item in the library.
- Clip size — Sets how tall the clip appears in its timeline track: Short, Medium, or Tall. This changes the track display only, not the clip's content. Use it to tidy up busy timelines. Press Shift-R to cycle a selected clip through the three sizes. The size selector doesn't appear for storyline clips or titles.
Clip Properties#
The Clip Properties module reports where the selected clip's content comes from.
- In — The source timecode where the clip starts.
- Out — The source timecode where the clip ends.
- Parent — The library item the clip was cut from. Click the name to select that item; shows None when the clip has no parent.
Layout#
The Layout module positions and scales the selected clip inside the timeline frame. It appears for clips that can be positioned, and for titles.
- Alignment controls — Snap the clip against an edge or to the center of the frame. The six controls are Align left, Align center, Align right, Align top, Align middle, and Align bottom.
- Position — The clip's on-screen location, as X (horizontal) and Y (vertical) offsets. Position is anchored to the top-left corner of the frame, where X and Y are both 0; the timeline resolution sets the bottom and right edges. Each field stays blank until you set a value or move the clip.
- Scale — The clip's rendered size, as Width and Height in pixels. When you bring a clip into a timeline, Sequence scales it to fit the timeline resolution. The Constrain scaling toggle, on by default, locks the aspect ratio so changing one dimension updates the other.
- Fit — Scales the clip to fit entirely within the frame, preserving its aspect ratio.
- Fill — Scales the clip to cover the whole frame, cropping any overflow, while preserving its aspect ratio.
- Stretch — Scales the clip to the exact frame dimensions, ignoring its aspect ratio.
- Original — Restores the clip to its source dimensions. The Fit, Fill, Stretch, and Original buttons don't appear for titles.
- Cropping — Expand this section to trim the edges of the clip.
Note
Position, Scale, Opacity, and Volume can all be animated. When a property is armed for keyframing, its input keys a value at the playhead and the arrow controls step between keyframes. To shape those animations, see Keyframe graph editor and Adjust interpolation.
Timing#
The Timing module retimes the selected clip. It sets a playback speed as a percentage and a timing mode — for example forward or reverse. For the full workflow, see Retime a clip.
Blend and opacity#
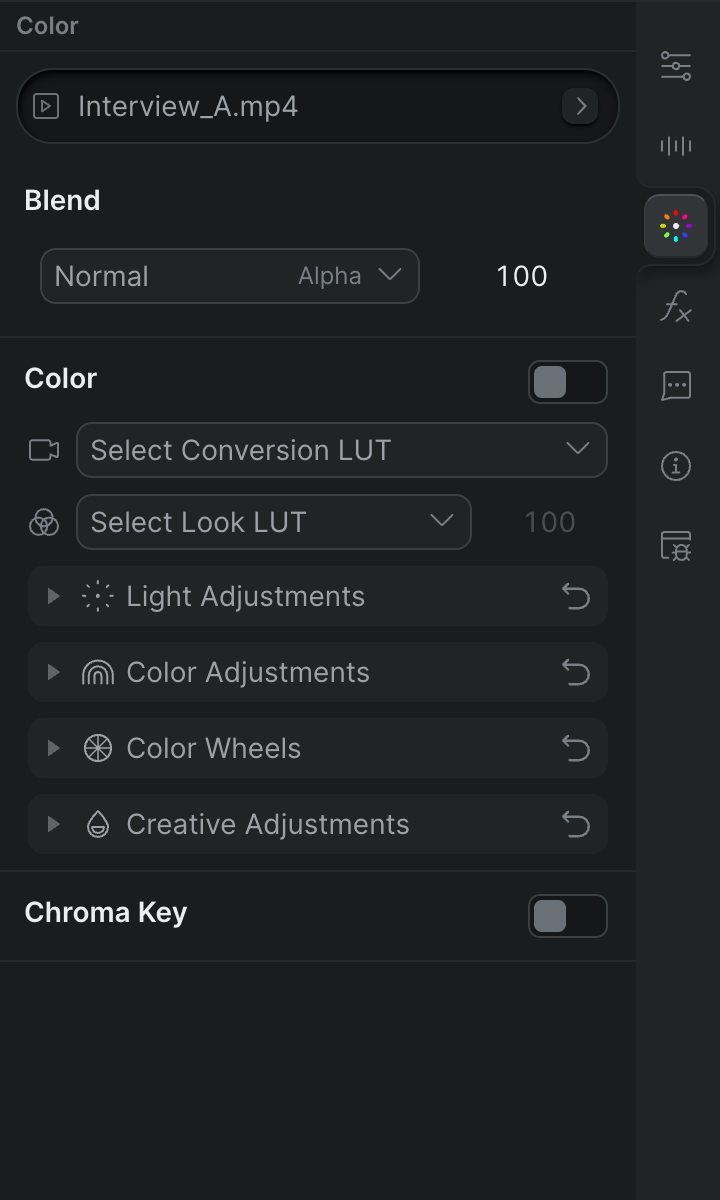
Open the Color tab to reach the Blend module, which controls how the selected clip composites over the clips beneath it.
- Blend mode — How the clip's pixels combine with the layers below: Normal, Add, Subtract, or Reverse Subtract. Default is Normal.
- Opacity — How transparent the clip is, from 0 to 100%. Default is 100%. Opacity is available only when the blend mode is Normal.
Volume#
Open the Audio tab to reach the Volume module for a clip with audio.
- Mute — The speaker button beside the slider silences the clip. Click it again to restore full volume.
- Volume — Sets the clip's level from 0 to 800%, where 100% is the clip's original loudness (the default). The slider is logarithmic and centered on 100%; type an exact value in the field if you prefer.
- Detach audio — When a clip carries its own audio, this button in the module header splits the audio onto its own clip so you can edit it separately.
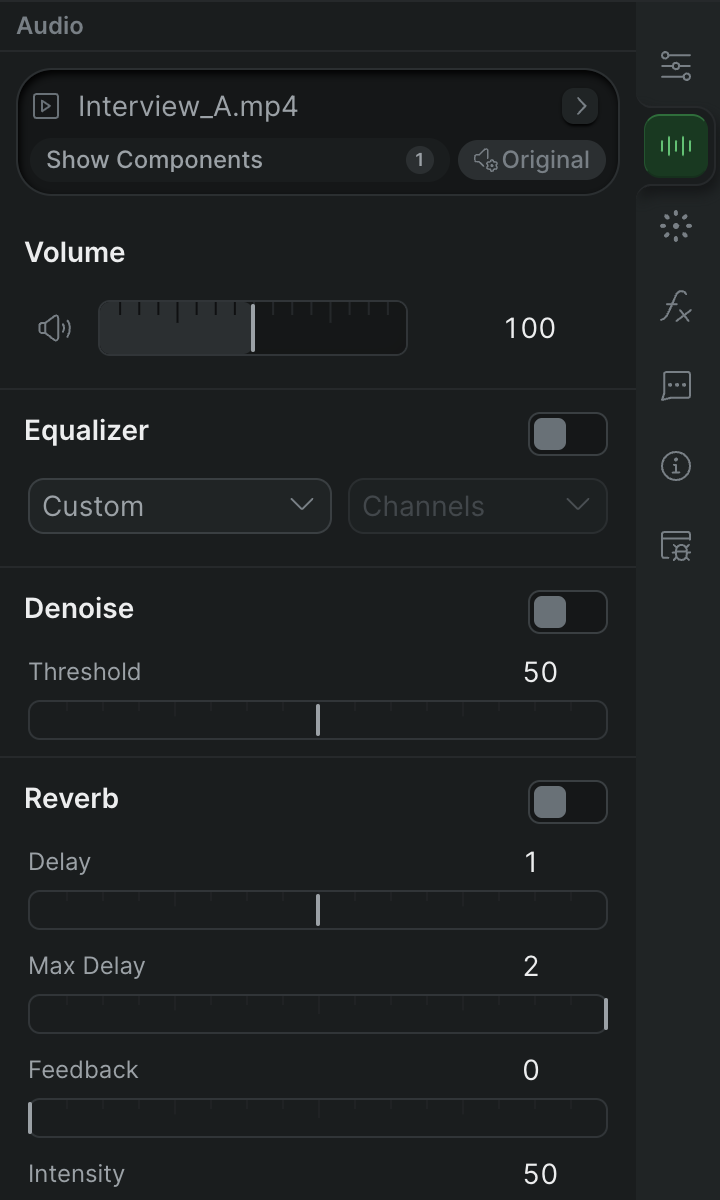
For channel routing and equalization, see Audio EQ and channels.
Timeline settings#
Select the timeline itself — rather than a clip — and the Edit tab shows the timeline's output settings.
- Resolution — The timeline's frame size in pixels, set as Width and Height, or chosen from a preset. This determines the frame that clips are positioned and scaled within.
- Frame Rate — The timeline's playback frame rate, chosen from the frame-rate list.
- Pixel Ratio — The pixel aspect ratio applied to the timeline's output.
- Audio Output — Read-only details of the timeline's audio output, including Output Sources, Sample Rate, Bit Depth, and the Input Channels and Output Channels counts.
Changing a timeline setting affects the whole timeline and is visible to everyone editing the project.