Render any timeline to a finished video file. In Sequence, you choose the format, codec, quality, resolution, and frame rate in the Export Timeline dialog, and Sequence renders the file in the background and adds it to your project library.
Start an export#
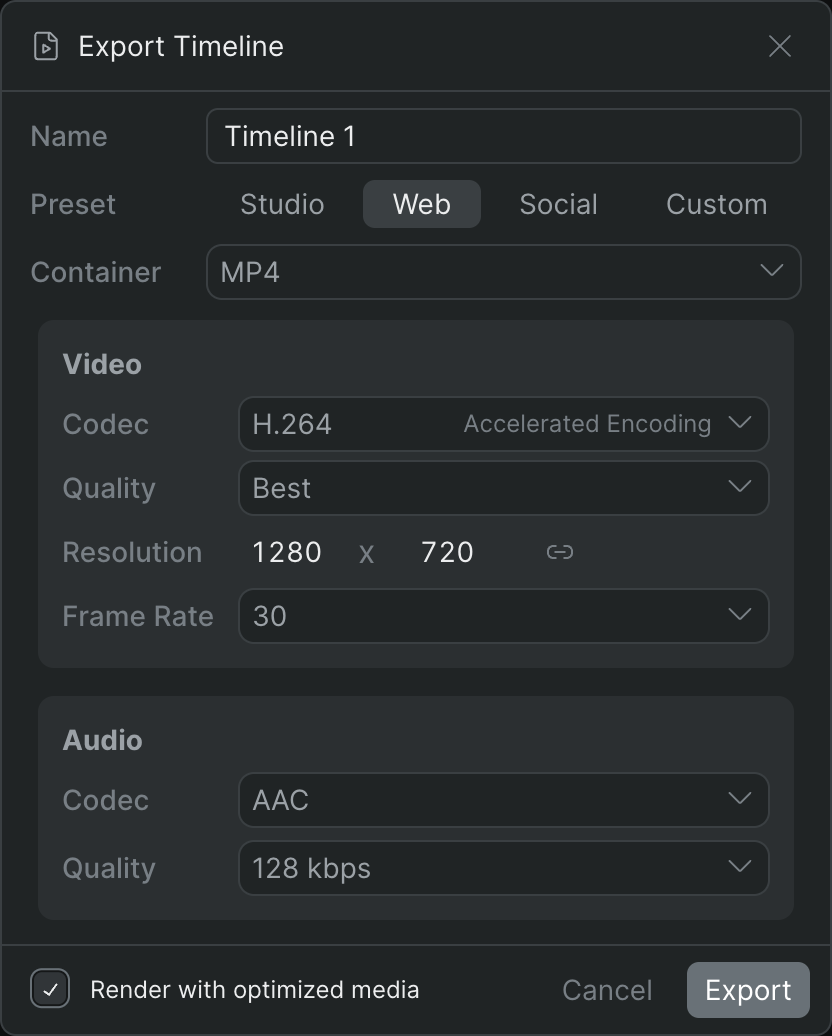
- In Sequence, do any of the following to open the Export Timeline dialog:
- From the library: Right-click the timeline in the timeline picker and choose Export Timeline.
- From the inspector: In the Timeline Exports module, click Export Timeline.
- In the dialog, type a Name for the exported file.
- Choose a Preset — Studio, Web, or Social — or select Custom to set each option yourself. The preset fills in the container, codec, and quality for you; changing any individual control switches the preset to Custom automatically.
- Set any video and audio options you want to change. For what each control does, see Export settings reference.
- Click Export.
Sequence starts the render as a background job and shows a New export started in background message. You can keep working while it runs.
Note: Some codecs and higher resolutions depend on your plan. If a choice isn't included in your plan, the Export button changes to Upgrade to Continue.
Note: If the timeline contains unlinked items, the dialog shows a This timeline contains unlinked items warning. Those items won't appear in the render — relink them first if you need them.
Watch the export and download the file#
- Track the render's progress in the progress queue. See Background jobs and the progress queue.
- When the render finishes, find the completed file in the Exports folder at the top of the library.
The exported file behaves like any other clip in your library: you can add it back to a timeline, or download it to your device.
To download it, right-click the file and choose Download. See Download library assets.
Tip: To move a timeline into another editing app instead of rendering a flat video, generate a timeline package. See Timeline packages.