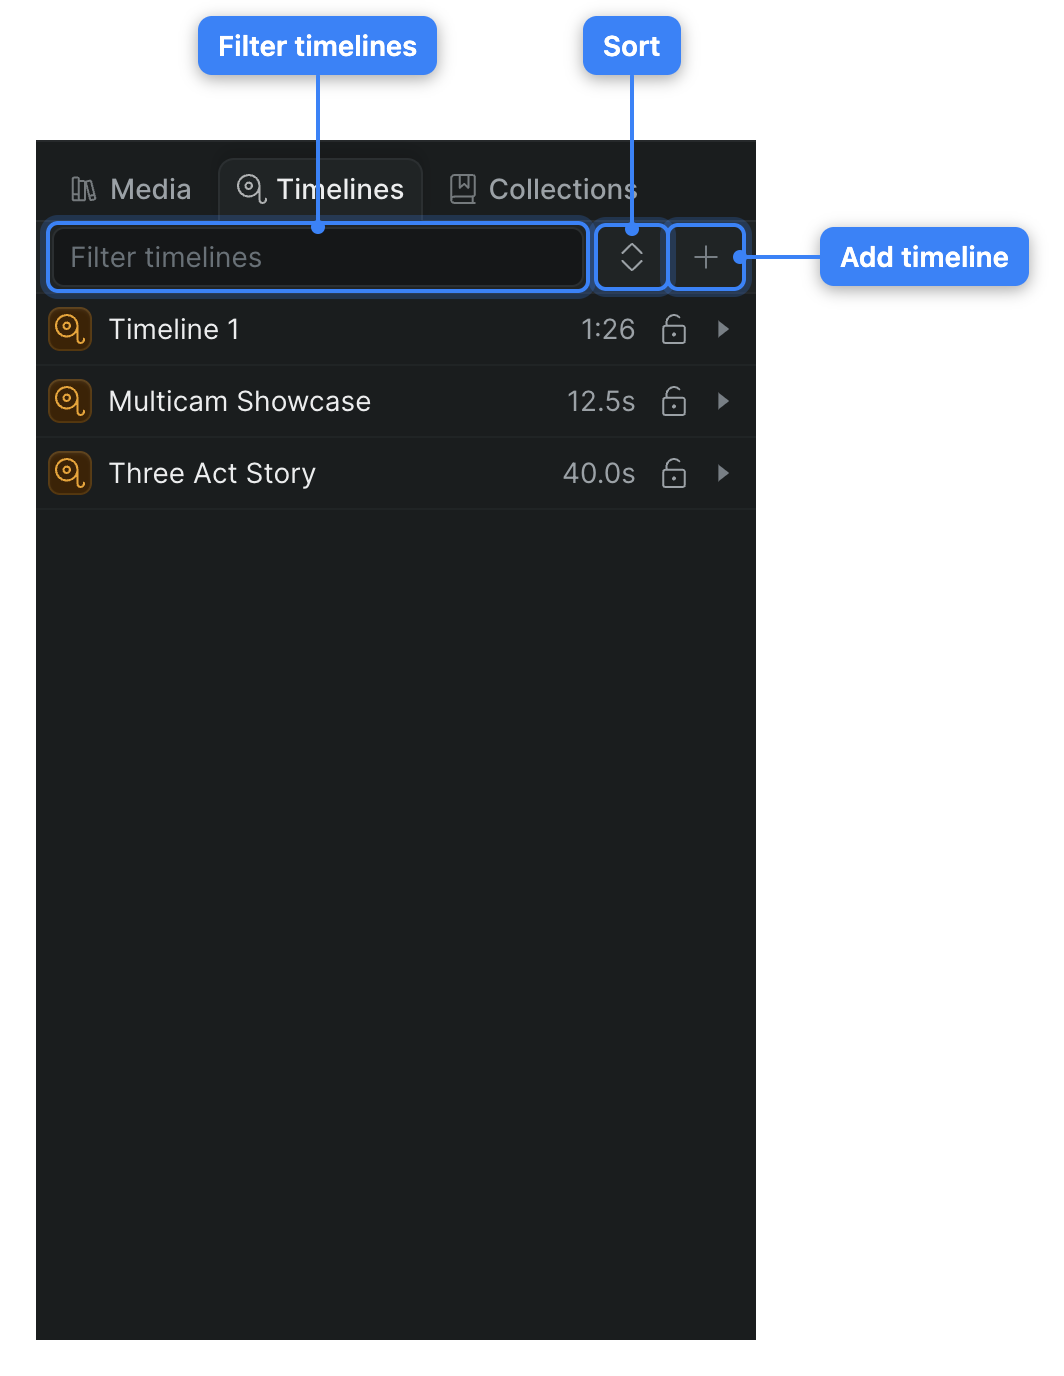
The Storytree is the tree of every timeline in your project. It lives in the Timelines tab of the Browser panel, and it draws each timeline as a row: top-level timelines sit at the root, and any timeline or compound clip nested inside another appears as an indented child row. Use it to see how your sequences fit together and to move between them.
Row types#
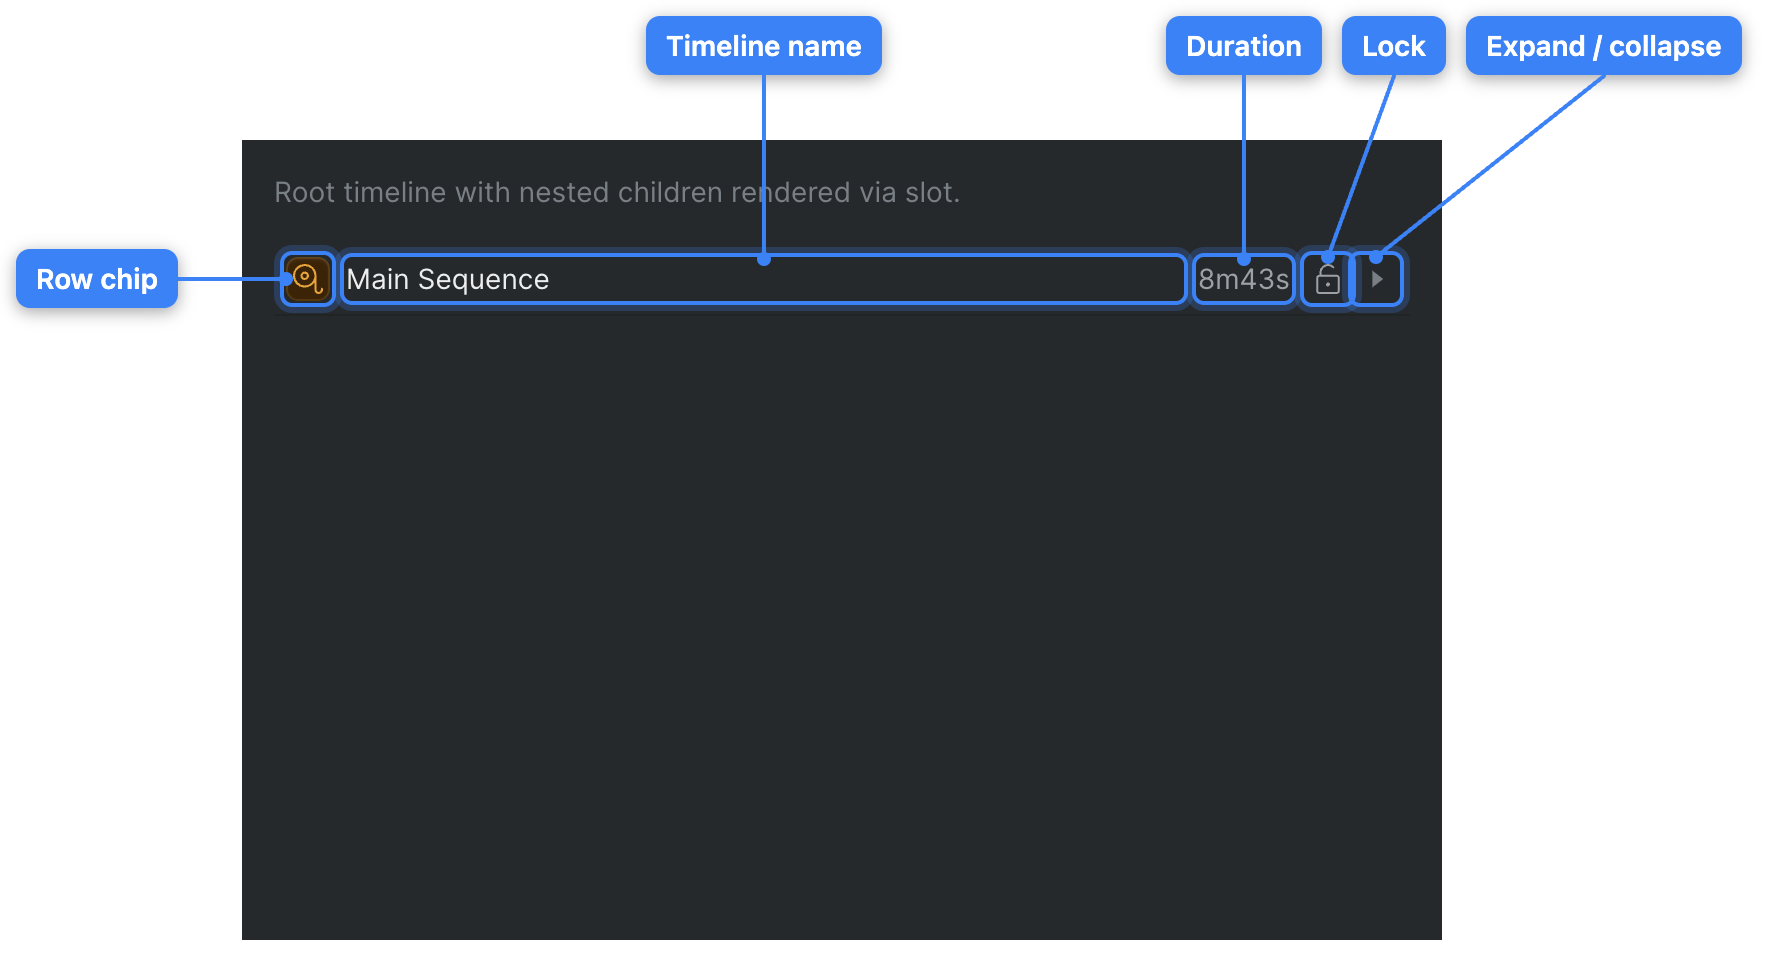
Every row carries a colored chip at its start that marks what the row is:
- Root timeline — a top-level timeline in the project. Root rows are the entries you see before you expand anything, and they show the timeline's full length.
- Nested timeline — one instance of a timeline placed inside another as a clip. The same timeline can appear under more than one parent; each placement is its own row. A nested-timeline row shows how much of that timeline the clip plays back, not the timeline's full length.
- Clip stack — a nested compound clip (a stack of clips grouped as one). It expands to reveal the clips inside it.
Expanding a nested timeline or clip stack reveals its own child rows, so you can read the whole hierarchy in place.
Select, expand, and drill into rows#
Each timeline row has an expand control on its right edge. A row with children shows a chevron; a row with none shows a dot.
- Select a row. Click it. Clicking a root timeline selects that timeline; clicking a nested row selects that clip instance and switches the timeline panel to the timeline that contains it. Cmd-click (Windows: Ctrl-click) a row to add or remove it from a multi-row selection.
- Expand or collapse in place. Click the chevron on the right of the row to reveal its child rows below it, or click it again to hide them.
- Drill into a timeline. Double-click the colored chip at the start of a row. The panel re-roots at that timeline, showing its contents as the full list with a header row for where you are and a Back button in the control bar. Click Back to return one level up.
Double-click targets differ
Double-clicking the chip drills into a timeline. Double-clicking the name starts a rename. Aim for the one you want.
Jump to the active timeline from the preview#
The preview monitor's source bar always shows what's currently loaded — its kind and name — and when the loaded source is a timeline, the bar shows its full ancestor chain (from the root timeline down to the active one) as a clickable breadcrumb.
- In the preview monitor, find the source bar above the picture.
- Click any segment in the breadcrumb.
Sequence switches the library to the Timelines tab, then reveals that timeline in the Storytree — expanding its ancestor chain, selecting it, and scrolling it into view.
Note
If the timeline can't be reached this way — an orphaned timeline, or one hidden by the Storytree's current presentation, such as a multicam container — Sequence shows a message explaining it couldn't be revealed instead of doing nothing.
Filter and sort the list#
The control bar sits above the tree:
- Filter field. Type to show only timelines whose name matches. Rows that contain a match nested inside them expand automatically so the match stays visible. When no timeline matches, the panel shows No timelines match with your query. While you are drilled into a timeline, the field filters within that timeline and its placeholder reads Filter inside the timeline's name.
- Sort control. Available at the root only. Open it to sort root timelines by Added, Name, or Duration. Click the active field again to flip between ascending and descending. Your choice is saved with the project.
- Add button. Select the + to create a new timeline.
Right-click a timeline row#
Right-click any timeline row to open its actions menu. The menu targets the row you right-clicked, whatever else is selected.
- Rename — puts the row's name into edit mode. Type the new name and press Enter. Hidden while the timeline is locked.
- Duplicate — makes a copy of the timeline.
- Lock / Unlock — toggles the timeline's lock. A locked timeline can't be renamed, edited, or deleted. The item reads Lock when the timeline is unlocked and Unlock when it is locked. Every timeline row also has a lock button inline, next to its expand control.
- Delete Clip — appears only on a nested row (a nested timeline or clip stack). It removes that one clip instance from its parent timeline and leaves the underlying timeline — and any other placements of it — in place. This action is gated on the parent timeline's lock, not the nested timeline's: if the timeline that holds the clip is locked, you can't delete the clip.
- Delete Timeline — deletes the timeline itself after a confirmation. Hidden while the timeline is locked.
Delete Clip vs. Delete Timeline
Delete Clip removes a single placement of a timeline. Delete Timeline removes the timeline everywhere. Reach for Delete Clip when you want the timeline to survive elsewhere.
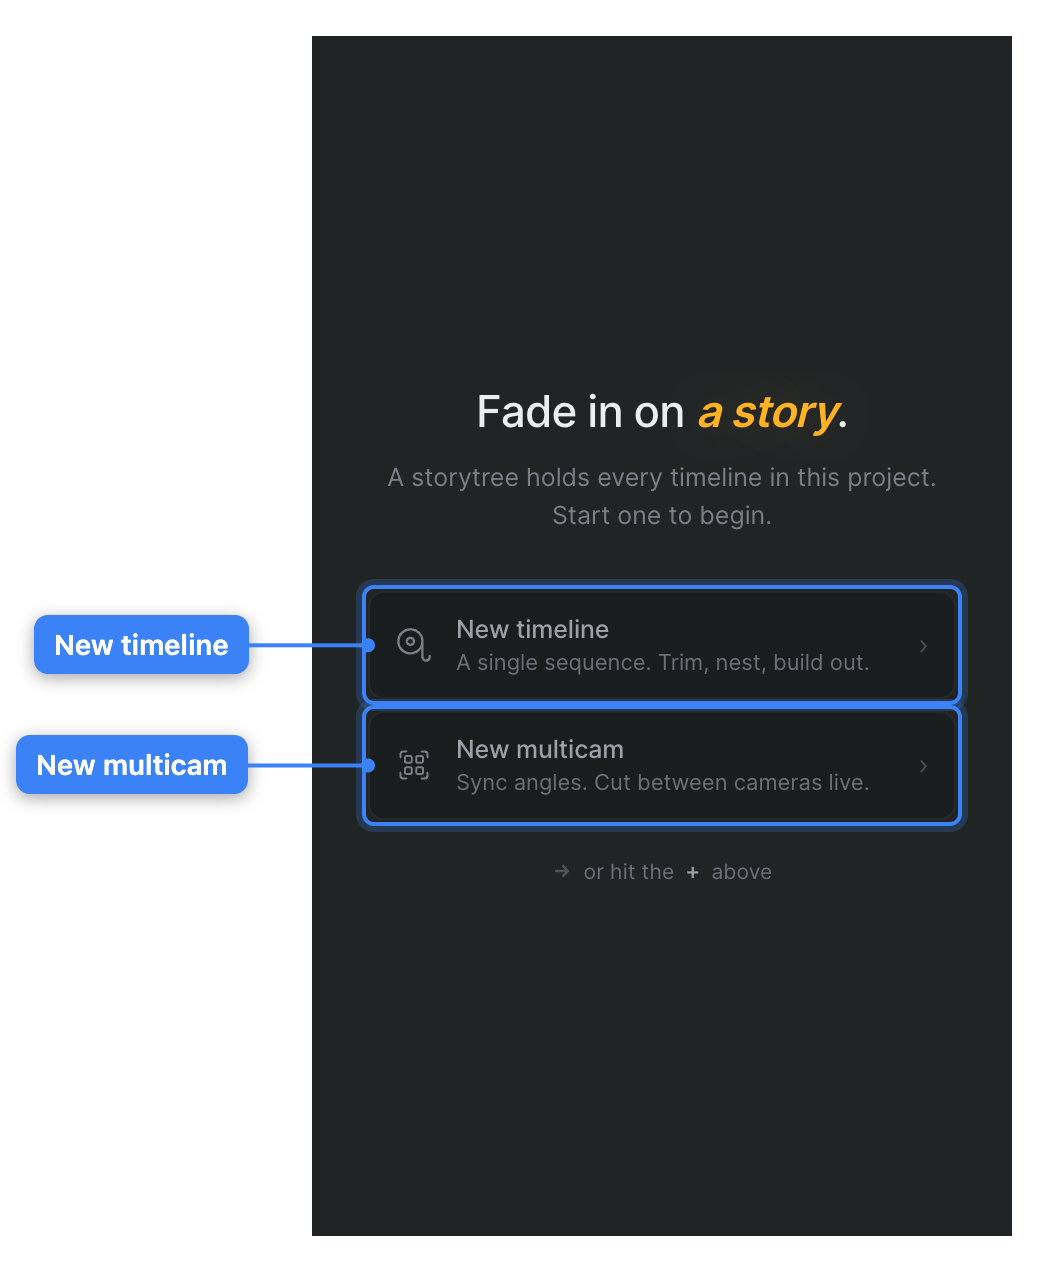
The empty state#
When a project has no timelines yet, the root of the Storytree shows a starter panel instead of a list: a short greeting, the line "A storytree holds every timeline in this project," and two buttons — New timeline and New multicam — plus a reminder that you can also use the + in the control bar. Select either button to create your first timeline. The starter panel appears only at the root of an empty project; drilling into a nested timeline that happens to be empty does not show it.