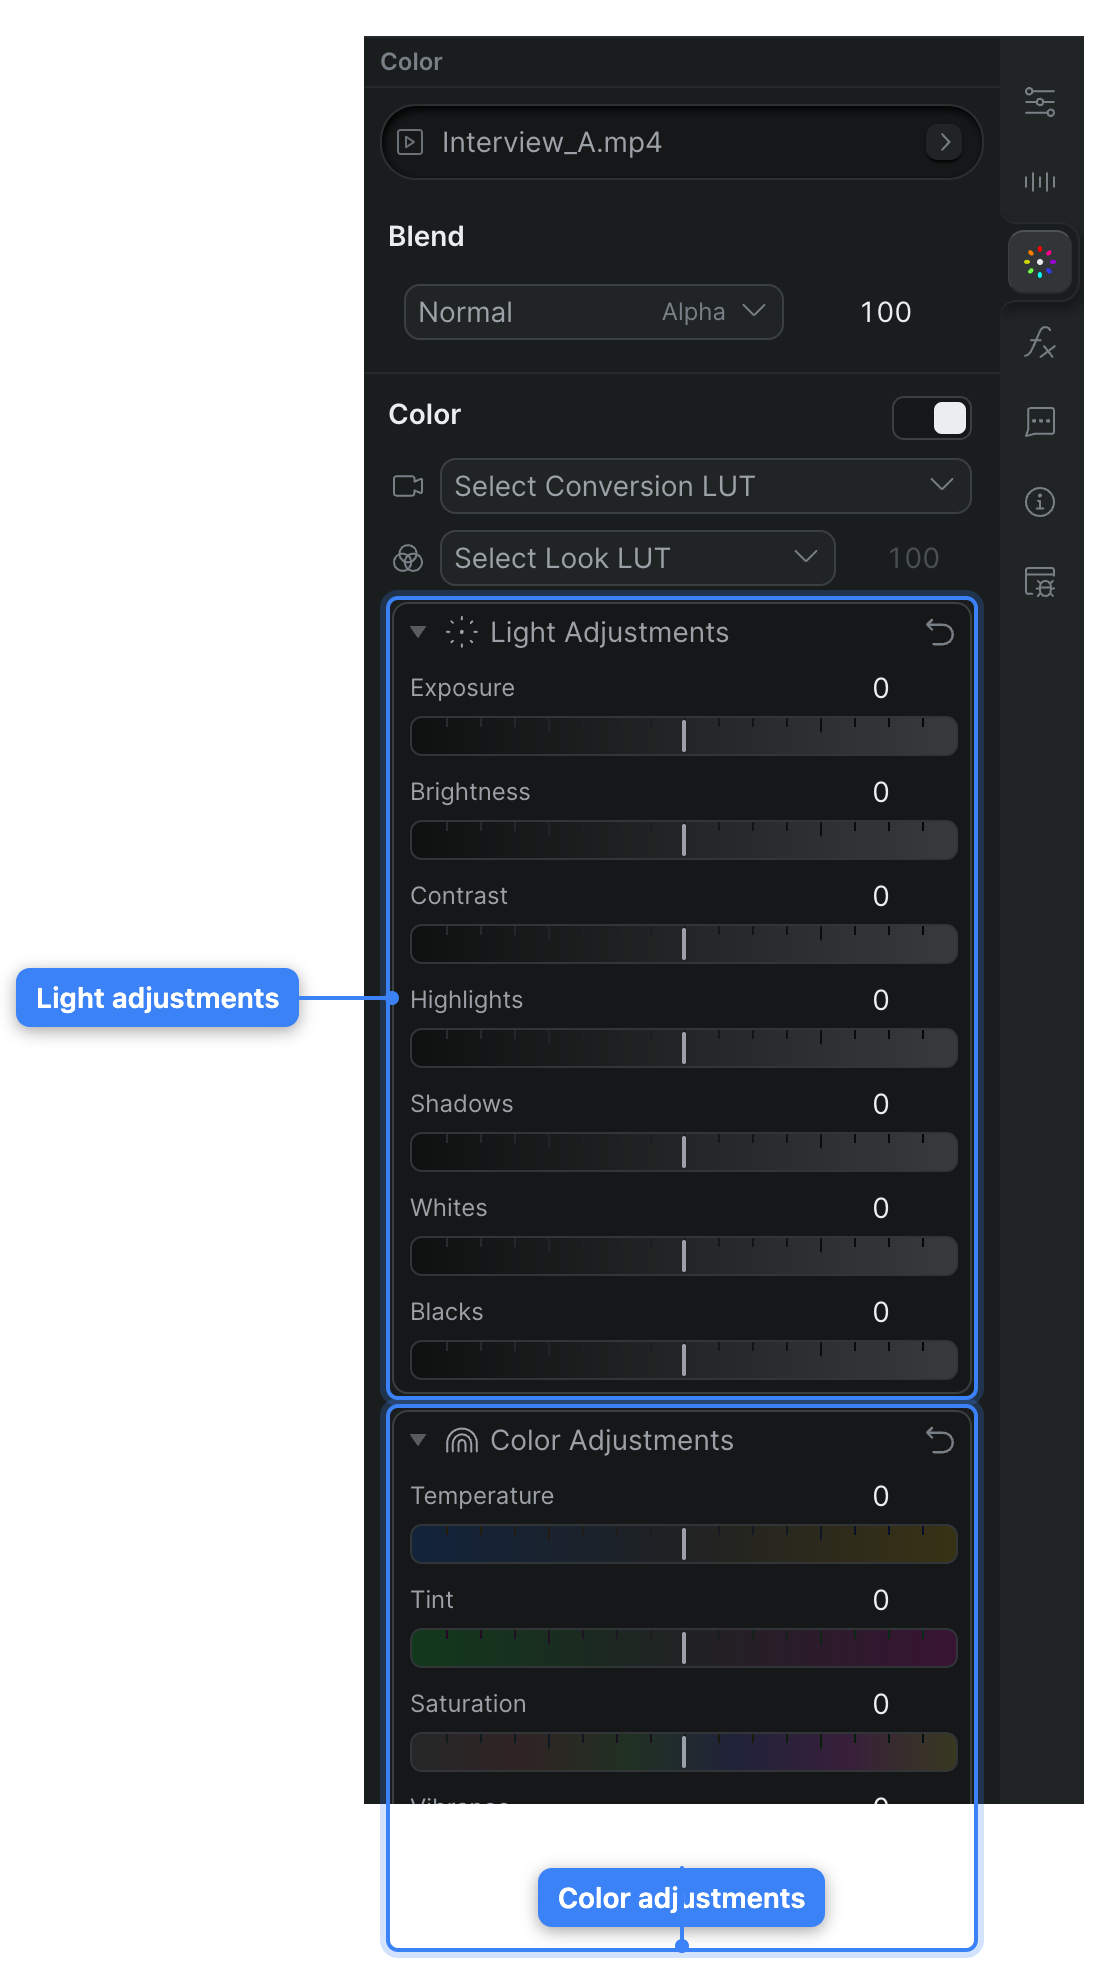
The Color tab in the inspector holds Sequence's manual grading sliders, grouped into three collapsible sections: Light Adjustments for tone, Color Adjustments for white balance and saturation, and Creative Adjustments for vignette and grain. To open them, select a clip in the timeline and click the Color tab in the inspector. For how to read the inspector, see Inspector Panel.
These sliders adjust the entire clip — there are no shapes or masks to limit them to part of the frame. For the built-in Color Wheels (three-way shadows/midtones/highlights) and LUT controls that share this tab, see Color wheels and Apply LUTs.
Note
Color adjustments are a project change. Sequence saves them with the clip, and they are visible to everyone with access to the project. Use the Toggle color on/off switch in the module header to compare the graded and ungraded clip without losing your settings.
Light Adjustments#
Expand Light Adjustments to shape the clip's brightness and tonal range. Every slider centers on 0 and runs from −100 to +100; positive values lift, negative values reduce. Controls appear top to bottom in this order:
Exposure: Sets the overall brightness of the clip by scaling all tones together. Default 0.
Brightness: Raises or lowers the midtone level, a gentler lift than Exposure. Default 0.
Contrast: Widens or narrows the gap between light and dark areas. Positive values deepen shadows and brighten highlights; negative values flatten the image. Default 0.
Highlights: Recovers or boosts the brightest parts of the image without moving the shadows. Pull it down to bring back detail in a blown-out sky. Default 0.
Shadows: Lifts or deepens the darkest parts of the image without moving the highlights. Push it up to open up crushed shadow detail. Default 0.
Whites: Sets the white point — the level at which tones clip to pure white. Default 0.
Blacks: Sets the black point — the level at which tones clip to pure black. Default 0.
Color Adjustments#
Expand Color Adjustments to set white balance and saturation. Temperature, Tint, Saturation, and Vibrance center on 0 and run from −100 to +100. Controls appear top to bottom:
Temperature: Shifts the image between cooler (blue) and warmer (orange). This is Sequence's manual white-balance control — the equivalent of a "Balance Color" step in other editors. Default 0.
Tint: Shifts the image between green and magenta, correcting the color cast Temperature can't. Use Temperature and Tint together to neutralize a color cast by eye. Default 0.
Saturation: Raises or lowers the intensity of all colors evenly. At −100 the image is fully desaturated (black and white). Default 0.
Vibrance: Raises the intensity of the less-saturated colors while protecting already-saturated ones and skin tones. Use it when Saturation is pushing skin or sky too far. Default 0.
Hue: Rotates every color around the color wheel, in degrees from 0 to 360. This is a numeric field rather than a slider. Default 0 (no rotation).
Creative Adjustments#
Expand Creative Adjustments to add a vignette or film-style grain. Each of the two controls reveals its own sub-settings when active.
Vignette: Darkens (negative values) or brightens (positive values) the edges of the frame to draw the eye toward the center. Runs from −100 to +100; default 0 (off). Expand it for:
- Radius: How far the vignette reaches in from the edges toward the center. Range 0–100; default 50.
- Roundness: The shape of the vignette, from a tighter oval toward a wider rectangle. Range 0–200; default 100.
- Softness: How gradually the vignette fades into the image. Higher values give a softer edge. Range 0–100; default 50.
Noise Type: Adds synthetic grain to the clip. Choose one of three options; the default is Off.
- Off: No grain. This is the default.
- Luma: Monochrome grain applied to brightness only.
- RGB: Colored grain applied across the red, green, and blue channels.
When Luma or RGB is selected, two more sliders appear:
- Amount: How much grain is added. Range 0–100; default 20.
- Strength: How coarse or intense each grain particle is. Range 0–100; default 10.
Tip
For a starting look before you touch these sliders, apply a creative LUT first (see Apply LUTs), then use the Light and Color sliders to fine-tune. To place color into specific tonal ranges rather than the whole clip, use the Color wheels.