A LUT (lookup table) remaps a clip's colors in one step. Sequence's Color tab gives you three kinds: a Camera Conversion LUT to bring log footage into standard Rec 709, a Creative Look LUT for a stylized grade, and a Custom LUT for a .cube file you upload yourself.
Note: You need Editor access to change a clip's color. See Roles and permissions.
Open the Color tab#
- In Sequence, select a clip in the timeline.
- Open the Color tab in the Inspector (press G then C).
The LUT controls sit at the top of the Color module. Choosing any LUT turns the color effect on automatically; the switch beside the Color heading toggles the whole effect off and on without clearing your settings.
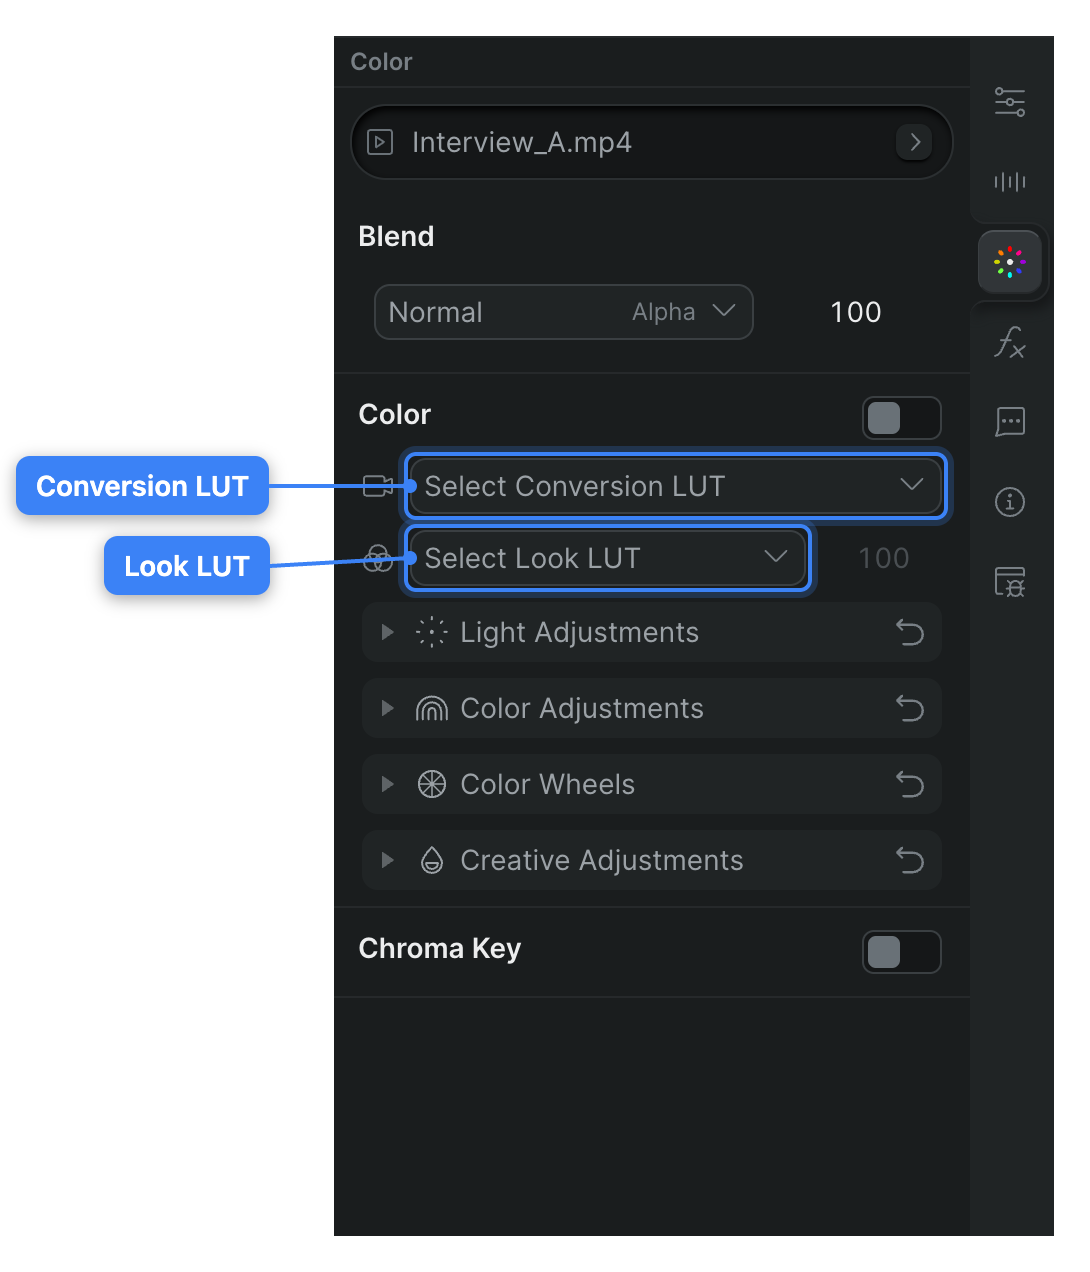
Note: The Color tab shows LUT controls only for a clip with a video stream. If you selected an audio-only clip, the tab reads No video stream found.
Apply a camera conversion LUT#
A camera conversion LUT converts log or flat footage into Rec 709 so it looks correct before you grade it. Apply this first, then make your color adjustments on top.
- In the Color tab, open the Camera Conversion LUT menu (labeled Select Conversion LUT when none is set).
- Choose the conversion that matches how the clip was shot.
The image updates to the converted look as soon as you choose. Sequence ships conversions for common camera log formats — cameras from makers such as ARRI, Sony, Canon, Blackmagic, Panasonic, and others — each converting that camera's log profile to Rec 709. To remove the conversion, reopen the menu and choose Select Conversion LUT.
Note: Match the conversion to the clip's actual recording format. Applying an ARRI LogC conversion to Sony S-Log footage, for example, produces wrong colors, not a corrected image.
Apply a creative look LUT#
A creative look LUT lays a stylized grade — a film emulation, a bleach-bypass, a teal-and-orange look — over the clip.
- In the Color tab, open the Creative Look LUT menu (labeled Select Look LUT when none is set).
- Choose a look from the list.
Sequence applies the look to the clip. To remove it, reopen the menu and choose Select Look LUT.
Adjust look intensity#
The Look Intensity control sits next to the Creative Look LUT menu and sets how strongly the look is applied, from 0 to 100 percent. It defaults to 100.
- Select a creative look LUT so the control becomes active. (It stays disabled until a look is set.)
- Set Look Intensity lower to blend the look back toward the original image.
Tip: Dropping intensity to around 50 is an easy way to soften a strong look without picking a different one.
Upload and apply a custom LUT#
You can bring your own .cube LUT into a project and apply it like a built-in look. Custom LUTs are stored per project.
- Add your
.cubefile to the project as a document. Sequence recognizes the.cubeextension and files it as a LUT automatically. See Documents in the library. - Select a clip and open the Color tab.
- Open the Custom LUT menu and choose your uploaded file.
Sequence applies the custom LUT to the clip and lists it by name, without the .cube extension. The Custom LUT menu appears only once the project has at least one uploaded LUT.
Note: A creative look LUT and a custom LUT share the same slot, so a clip uses one or the other — choosing a custom LUT clears the built-in look, and vice versa. The Look Intensity control applies to whichever look is active, so you can dial a custom LUT back the same way.