The effect editor is where you build a custom effect by hand. Use it when you're writing the effect yourself, bringing in one a colleague shared, or having an outside AI assistant — Claude, ChatGPT, or anything else you use — write it for you. You supply the effect and the controls you want to adjust it with, publish it into the project's effect Library, then apply it to any clip.
If you'd rather describe the effect you want and have Sequence build it in place, ask Snippy instead — see Create a custom effect with Snippy.
A custom effect is either a video effect or an audio effect, and you choose which when you create it. Video effects come in two flavors: one that adjusts the clip's existing picture (a look or grade, like a warm tint), and a generative one that draws its own pattern — a background, wipe, or overlay that looks the same over any clip. Audio effects process the clip's sound instead — a tape echo, a bitcrusher, a telephone filter. The steps below are the same for any of them; where the two kinds differ, it's called out.
Open the effect editor#
- Select a clip on the timeline and open the Effects tab in the Inspector.
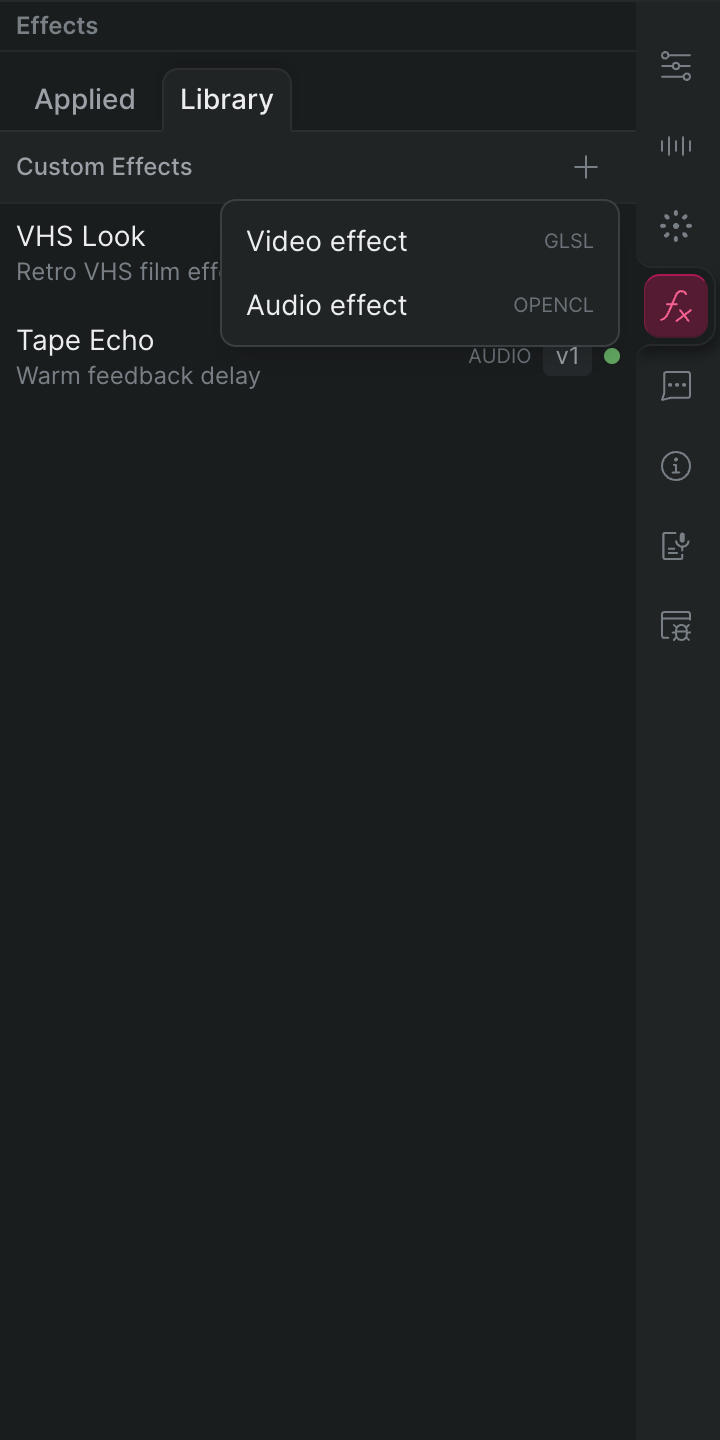
- Open the Library sub-tab, next to Applied in the tab bar. The Library lists every custom effect in the project.
- Click the + button in the Library header, then choose the kind of effect you're building: Video effect for picture, Audio effect for sound. Sequence opens the effect editor, set up for that kind.
- Click the name field at the top of the editor — it defaults to "New Effect" (or "New Audio Effect") — and type a name.
The kind is fixed at creation
An effect's kind is locked by its first published version. If you picked the wrong one, create a new effect rather than trying to convert this one.
Bring in the effect as JSON#
You provide the effect and its controls together, bundled as a small block of JSON: your effect code and the controls you want to expose. Click the JSON button near the top-right of the editor to open the Import / Export JSON panel, then do either of the following:
- Paste in a bundle you already have. Paste it into the text area and click Apply JSON. The editor fills in from the bundle.
- Have an outside assistant write it. Click Copy LLM Prompt. That copies a prompt describing the exact bundle format Sequence expects. Paste it into Claude, ChatGPT, or whichever assistant you use, along with a description of the effect you want. Copy the JSON it replies with, paste it into the same text area, and click Apply JSON.
The same panel exports the current effect as JSON, so you can hand a finished effect to a colleague or feed it back to an assistant for revision.
Define the controls#
Alongside your effect code, you list the controls you want to expose — the dials a person adjusts on the clip after applying the effect. Each control is described in plain terms:
- Name — matches the control to the value it drives in your effect. A video shader and its controls share these names, so a control named
intensitydrives the shader'sintensityvalue. Audio effects address their controls by position instead, so an audio control's name is a label for you — hyphens are allowed, as inbase-hz. - Label — the name that shows in the Inspector (for example, "Intensity").
- Type — a number, a color, or an on-off. Audio effects take numbers only (whole numbers or decimals); the editor offers only those types once the effect's kind is audio.
- Control style — a slider, a knob, a color picker, or a switch.
- Range and default — the lowest and highest value the control accepts, and the value it starts at.
- Group — an optional heading the control sits under in the Inspector, for organizing related controls together.
The bundle has the same shape for both kinds — the code goes in shaderProgram either way. The example below exposes one number on a slider and one color on a color picker, both under a "Look" heading, with your shader code standing in for the rest:
{ "shaderProgram": "<your shader code>", "inputs": [ { "name": "intensity", "label": "Intensity", "uniformType": "float", "inputHint": "slider", "min": 0, "max": 1, "defaults": [0.35], "group": "Look" }, { "name": "tint", "label": "Tint", "uniformType": "vec3", "inputHint": "color_picker", "min": 0, "max": 1, "defaults": [1.0, 0.75, 0.45], "group": "Look" } ]}Animate a custom effect
Every control you expose is an ordinary Sequence property. To animate the effect over time, arm a control for keyframing and change its value across the clip, exactly as you would Position or Opacity. See Keyframe animation.
Publish and validate#
- Click Publish v1 at the bottom-right of the editor.
- Sequence validates the effect. A green "passed" confirmation means it's ready to apply; a red report lists what to fix. For an audio effect, Sequence also runs the effect against test tones and reports any behavioral checks it fails — for example, a filter that rings out of control or that isn't consistent from one playback to the next. Advisory checks appear alongside a passing result; they don't block publishing.
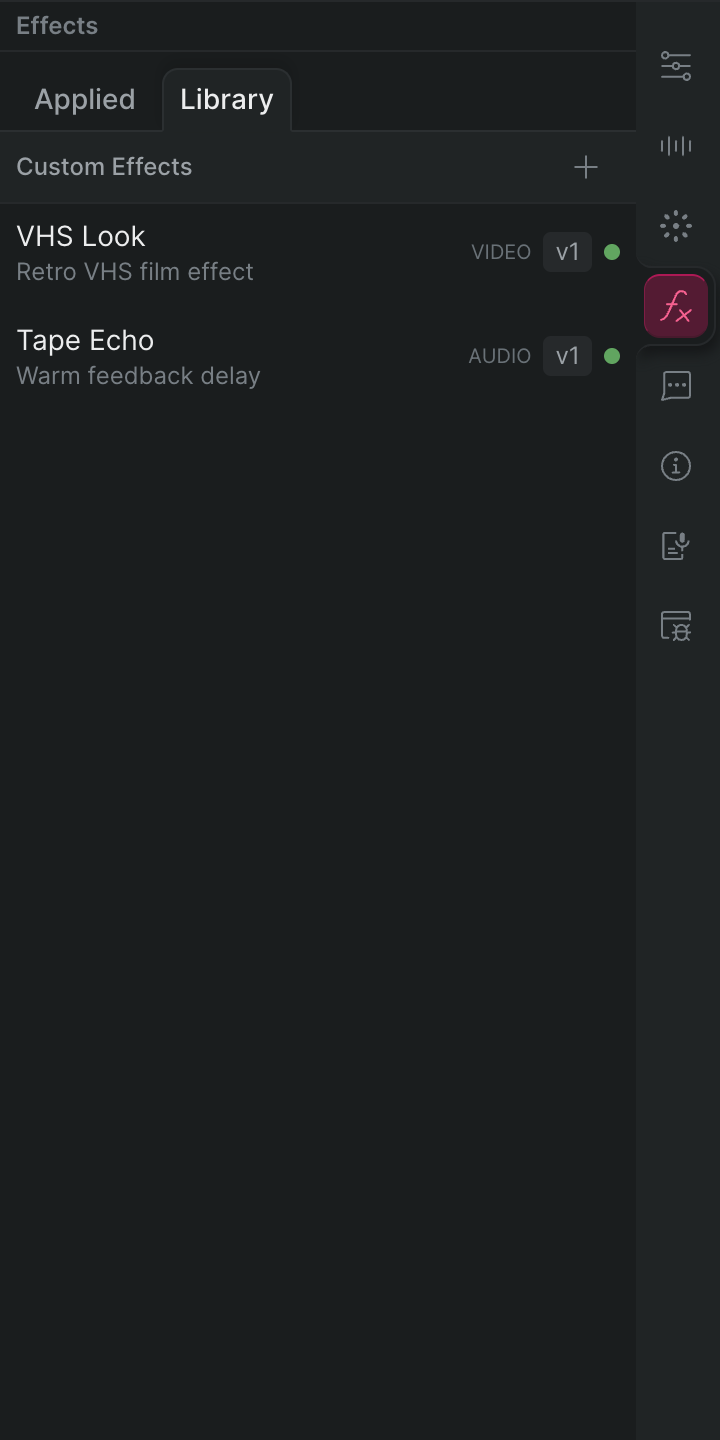
Your effect now appears in the Library with a v1 badge, an audio or video kind label, and a green status dot, ready to apply to any clip.
Versions are kept
Each time you publish, Sequence adds a new version and keeps the old ones, so you can revert to an earlier one. The version badge on the Library row tracks the current version.
Apply the effect#
Once the effect is published and validated, add it to a clip from the Applied sub-tab — see Apply the effect to a clip.