Caption clips display spoken words from your media's transcripts over your video. Captions display a page at a time and animate words in time with speech. Captions appear in the preview and are burned into exported video.
Sequence needs transcripts for the speech you want to caption. If a transcript is still processing or no speech was found, check the clip's Transcript tab first.
Generate captions for clips#
- Select one or more storyline clips in the timeline.
- Open the command palette with Cmd-K (Windows: Ctrl-K).
- Search for and choose Generate Captions.
Sequence attaches a caption above each eligible selected clip, matching its visible duration, and selects the new captions. Undo once to remove all captions created by the command. Running the command again on clips that already have attached captions doesn't add duplicates.
The command skips clips without a usable transcript, clips playing in reverse or on hold, and clips that aren't eligible storyline clips. For a multicam clip, it uses the transcript from its audio angle.
Draw a caption over a range#
- Choose the Caption tool in the timeline control bar, or press Shift-T.
- Drag across the timeline to draw a caption clip, then drop it above a storyline clip to attach it.
A caption can span more than one shot. It uses transcribed speech from enabled clips that overlap its range, including attached clips such as a voiceover. Clips with audio turned off, clips playing in reverse or on hold, and clips without a transcript don't contribute words. Nested timelines and multicam audio can also contribute speech.
Style and position captions#
Select a caption clip and open its Caption controls in the inspector.
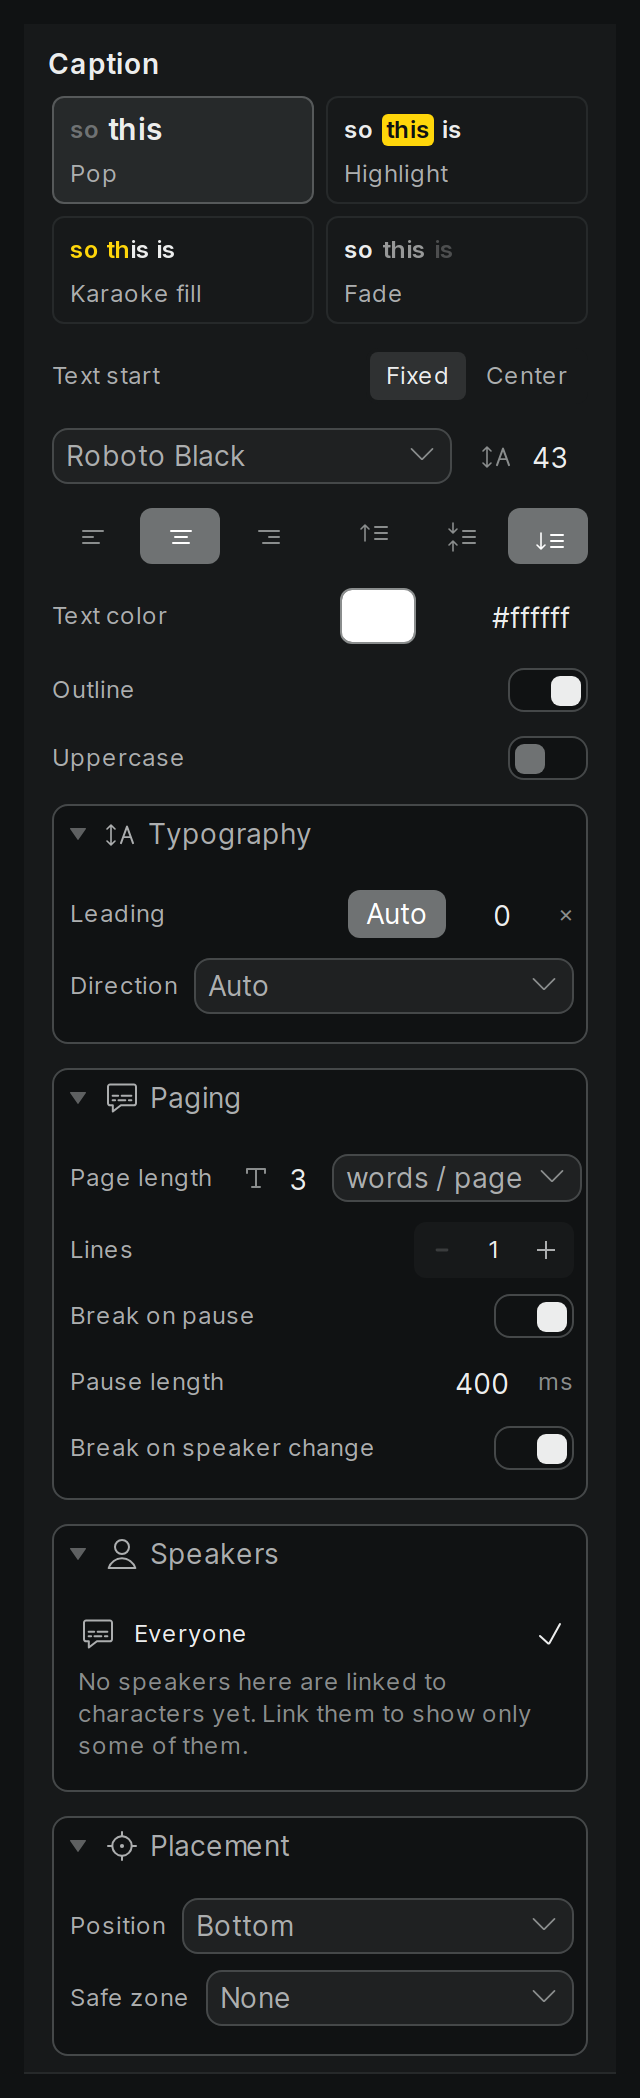
You can adjust:
- Style: Choose Pop, Highlight, Karaoke Fill, or Fade to change how words appear as they are spoken.
- Text: Choose a font, size, text and accent colors, outline, and uppercase styling. Text Start controls whether words appear in their final positions or the line grows as words are spoken.
- Page Length and Lines: Choose how many words per page or characters per line to show, and use one or two lines. You can also break pages on pauses or speaker changes.
- Speakers: Show everyone or select characters to show only their words. Filtered captions omit words that aren't linked to a selected character. See Speakers and characters.
- Position and Safe Zone: Choose a position and, for preset positions, a safe zone for TikTok, Reels, or Shorts. You can also choose a custom position.
To position a selected caption freely, drag its box in the viewer. Use its handles to resize it. Check the preview for readability and to make sure the text fits within the frame.
Review and export#
Play through the captioned range and check the wording, timing, placement, and readability. Captions derive their words from the underlying transcripts rather than a separate caption text field. Changes to the edit, such as trims or speed changes, update how the caption follows the clips beneath it.
When you're ready, export the timeline. Enabled captions are rendered into the video image, so viewers don't need to turn on a separate caption track. If a transcript can't load during export, the export can fail; check that the source transcripts are available and try again.
You can also ask Snippy to add captions over a time range. It reports when it finds no spoken words in that range. See Snippy capabilities.